
Step into the world of DIY magic as we delve into the realm of Bondo, where creativity and craftsmanship intertwine. Whether you’re a seasoned handy-person or a beginner exploring the marvelous world of repairs and renovations, learning how to use Bondo can be a game-changer. With its miraculous ability to transform damaged surfaces into flawless works of art, this versatile substance is about to become your secret weapon in tackling imperfections with finesse. This article will guide you through the enchanting process of using Bondo, revealing the secrets and techniques to unleash your inner restoration maestro. Grab your tools, don your imagination, and let’s embark on a captivating journey into the enchanting world of Bondo mastery.
Table of Contents
- Choosing the Right Bondo for Your Project
- Prepping the Surface for Bondo Application
- Mixing and Applying Bondo Correctly
- Sanding and Shaping Bondo for a Smooth Finish
- Tips for Ensuring Proper Bondo Curing
- Priming and Painting Over Bondo for a Seamless Result
- Q&A
- Closing Remarks

Choosing the Right Bondo for Your Project
When it comes to tackling any DIY project, choosing the right Bondo is essential for achieving professional-quality results. With the wide range of Bondo products available, it can be overwhelming to determine which one suits your specific project needs. Whether you’re repairing a cracked surface or filling holes, here are some tips to help you select the perfect Bondo for your project:
-
- Identify the surface: Before selecting a Bondo, assess the type of surface you’re working with. Different surfaces require different types of Bondo. For example, for metal surfaces, you would need a metallic filler. For wood surfaces, a wood filler would be more appropriate. Ensure that the Bondo you choose is compatible with the material you are repairing.
-
- Consider the size and depth of the repair: Bondo products come in different formulations based on the size and depth of the repair you need to make. For small and shallow repairs, a lightweight filler will suffice. However, for larger and deeper repairs, you may need a stronger and more resilient Bondo product to ensure a durable fix.
-
- Check the drying time and sandability: The drying time and sandability of a Bondo can significantly impact the overall speed and quality of your project. Some Bondo variants dry quickly, allowing you to sand and paint within a few hours, while others may require more time to cure. Consider your timeline and desired finish when selecting your Bondo.
Prepping the Surface for Bondo Application
Start by thoroughly cleaning the damaged area with soap and water. This will remove any dirt, grease, or other contaminants that may hinder the bonding process. Use a lint-free cloth or sponge to ensure a clean surface. Once cleaned, be sure to dry the area completely before moving on to the next step.
Remove Loose Paint or Rust:
If you notice any loose paint or rust on the surface, it’s important to remove it before applying Bondo. A wire brush or sandpaper can often do the job effectively. Work gently and make sure to smoothen the edges around the damaged area to create a seamless transition.
Apply Masking Tape:
To protect surrounding areas from accidentally getting coated with Bondo, apply masking tape on the edges of the damaged area. This will create defined boundaries and make it easier to clean up afterwards. Ensure the tape is firmly pressed down to prevent any Bondo from seeping underneath.
Mixing and Applying Bondo Correctly
Mixing Bondo:
Before diving into the application process, it’s important to mix the Bondo correctly for optimal results. Follow these simple steps:
-
- Start by putting on gloves to protect your hands.
-
- Use a plastic or metal mixing board to ensure proper bonding.
-
- Squeeze out equal parts of the Bondo resin and hardener on the mixing board.
-
- Thoroughly mix the two components together with a plastic spreader or putty knife until you achieve a uniform color.
-
- Pro Tip: Remember to work quickly as Bondo hardens fast, so only mix small batches at a time.
Applying Bondo:
Once the Bondo is properly mixed, it’s time to apply it to the damaged area. Follow these steps for a seamless application:
-
- Identify and clean the damaged area, ensuring it’s free from dirt, dust, and grease.
-
- Using the same plastic spreader or putty knife, apply a thin layer of Bondo over the damaged area.
-
- Smooth out the Bondo by feathering the edges, blending it into the surrounding surface.
-
- Allow the Bondo to fully cure as per the manufacturer’s instructions.
-
- Pro Tip: For larger repairs, consider applying multiple thin layers, allowing each layer to dry before applying the next.
Bondo Application Chart:
| Bondo Type | Recommended Use | Drying Time |
|---|---|---|
| Standard Bondo | Repair small to medium-sized dents | 20-30 minutes |
| High-Density Bondo | Ideal for filling large dents or holes | 30-45 minutes |
| Glass-Reinforced Bondo | Perfect for repairing rusted metal surfaces | 45-60 minutes |
With these simple steps and the right Bondo type for your repair needs, you’ll be able to mix and apply Bondo like a pro. Just remember to read and follow the manufacturer’s instructions for best results. Now, go ahead and restore your vehicle’s beauty with confidence!
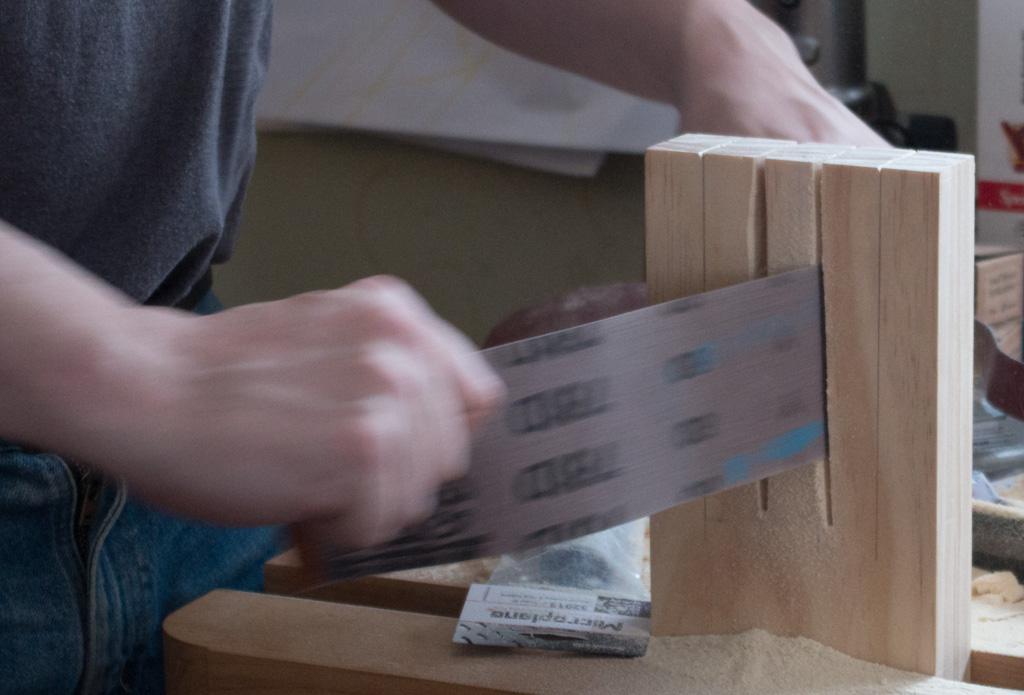
Sanding and Shaping Bondo for a Smooth Finish
When it comes to achieving a smooth finish, sanding and shaping Bondo is a crucial step in the process. Bondo is a versatile material commonly used for automotive repairs, woodwork, and even DIY projects. Whether you are fixing a dent in your car or filling in gaps in wood surfaces, here are some tips and techniques to help you sand and shape Bondo like a pro:
1. Gather the necessary tools:
-
- Sanding block or sandpaper
-
- Body filler spreader or putty knife
-
- Disposable gloves
-
- Dust mask
-
- Eye protection
2. Start by sanding the Bondo:
Before you begin sanding, make sure there are no loose or rough particles on the Bondo surface. Use a sanding block or sandpaper to smooth out any imperfections and create an even surface. Start with a coarse grit sandpaper and gradually move to a finer grit for a smoother finish. Remember to sand in a circular or back-and-forth motion to avoid creating deep scratches.
3. Shape the Bondo:
Once you have sanded the surface, it’s time to shape the Bondo to achieve the desired contour. Use a body filler spreader or putty knife to apply pressure and shape the Bondo according to your needs. Work carefully and ensure that the Bondo is evenly distributed. If needed, you can add multiple layers of Bondo, allowing each layer to dry before applying the next. This will help you achieve a more seamless finish.

Tips for Ensuring Proper Bondo Curing
Bondo is a versatile material commonly used in automotive repair and other DIY projects. It is a vital step in achieving a smooth and professional finish. To make the most of your Bondo application, here are some useful tips to ensure proper curing:
1. Prepare the Surface
Proper surface preparation is essential for Bondo to adhere and cure effectively. Begin by cleaning the area thoroughly with soap and water, and remove any rust, oil, or dirt. Once clean, use a sandpaper or sanding block to roughen the surface slightly, promoting better adhesion.
Remember to also remove any loose or damaged material, ensuring a clean and smooth surface for the Bondo application.
2. Mix it Right
Mixing the Bondo correctly is crucial for achieving the desired results. Follow the instructions provided on the packaging carefully. Use a clean mixing surface and the recommended ratio of hardener to Bondo. Mix the two components thoroughly until you achieve a uniform color and a smooth consistency.
3. Apply in Thin Layers
When applying Bondo, remember that thin layers are more effective than a thick coat. Apply the Bondo using a spreader, ensuring an even and smooth application. Avoid over-applying, as it can lead to cracking and slower curing times.
Allow each layer to fully cure before applying additional coats or sanding. This will ensure optimal bonding and a durable repair. Sanding between layers and after curing will help achieve a seamless and professional finish.
4. Use Ample Time for Curing
Proper curing time is paramount for Bondo to fully harden and provide a strong and long-lasting repair. Follow the recommended curing time provided on the packaging, as it may vary depending on the environmental conditions. It is crucial to allow ample time for the Bondo to cure before attempting any sanding or painting.
Remember that colder temperatures and higher humidity levels can increase the curing time, so be mindful of the conditions when working with Bondo.
| Summary | Key Points |
|---|---|
| Surface Preparation | Clean, roughen, and remove loose material for better adhesion. |
| Mixing Bondo | Follow instructions, mix thoroughly for uniform color and consistency. |
| Thin Layer Application | Avoid over-applying for optimal bonding and faster curing. |
| Ample Curing Time | Respect recommended curing time before sanding or painting. |

Priming and Painting Over Bondo for a Seamless Result
After applying Bondo to repair any dents or damages on your surface, the next crucial step is priming and painting. This process ensures a seamless result, making it difficult to distinguish the repaired area from the original surface. With a few simple steps, you can achieve a professional-looking finish that will last for years to come.
To begin, you’ll need to gather your materials. This includes a high-quality primer, paint, sandpaper, a paintbrush, and a clean cloth. Start by lightly sanding the Bondo repair area to smooth out any rough edges or imperfections. Wipe away any dust or debris with a clean cloth to ensure a clean surface.
Next, apply the primer using a paintbrush or a foam roller. Make sure to coat the entire Bondo repair area evenly. The primer helps to create a smooth surface for the paint to adhere to, as well as providing additional durability. Allow the primer to dry completely before moving on to the next step.
Once the primer has dried, it’s time to apply the paint. Choose a paint color that matches the surrounding area, or create a custom color if needed. Use a paintbrush or a paint sprayer to apply a thin and even coat of paint over the Bondo repair area. It’s important to feather the edges of the paint to blend it seamlessly with the rest of the surface. Allow the first coat to dry and then apply additional coats as necessary until you achieve the desired coverage and finish.
By following these steps, you can ensure a professional-looking result when priming and painting over Bondo repairs. The key is to take your time, apply thin and even coats, and feather the edges for a seamless blend. With a little patience and attention to detail, your Bondo repair will disappear into the surrounding surface, leaving you with a flawless finish that will stand the test of time.
Q&A
Q: What exactly is Bondo, and why should I use it?
A: Ah, Bondo, the magical elixir of fix-its! Bondo is a versatile body filler that can be used to repair all sorts of damaged surfaces, such as dings, dents, scratches, and even rust holes. In other words, if your favorite heirloom vase has had a tumble or your beloved car has unavoidable battle scars, Bondo can come to the rescue!
Q: Where can I find Bondo, and does it come in different forms?
A: Fear not, seekers of Bondo knowledge! This marvelous product is available at most automotive supply stores, as well as large hardware retailers. And guess what? It comes in a few different varieties to suit your specific needs. You can find Bondo in traditional paste form, which works great for filling minor surface blemishes. There’s also Bondo with fiberglass, perfect for addressing larger holes or areas of extensive damage. It’s like having a Bondo superhero with different powers for various tasks!
Q: Okay, I found my Bondo. How do I use it to fix a dent?
A: Time to put on your handyman (or handywoman) cape! The first step is to clean the area you wish to repair thoroughly. Make sure it’s free from dirt, grease, and loose paint. Next, grab your Bondo and mix it according to the manufacturer’s instructions. Once you have a uniform consistency, apply the Bondo to the damaged area with a putty knife, ensuring you feather the edges for a seamless blend. Allow the Bondo to dry completely, then grab some sandpaper and get to work smoothing out the surface. Remember, patience is your ally! Once the repaired area is smooth, you can paint over it to match the rest of the surface. Voila! The dent is kicked to the curb!
Q: Can Bondo be used on surfaces other than metal?
A: Absolutely! Bondo is not just for metal repairs; it’s a jack-of-all-trades. While it’s commonly used on metal surfaces, it works wonders on wood, fiberglass, and even certain types of plastic. So whether it’s your trusty old wooden rocking chair or that vintage fiberglass surfboard you adore, Bondo can grant them a second chance at life.
Q: Is using Bondo difficult for a beginner?
A: Though mastering the art of Bondo may sound intimidating, fear not, oh novice artisans! While it may take a bit of practice to achieve seamless perfection, using Bondo is relatively simple. Just follow the provided instructions carefully, take your time, and allow yourself to learn from your mistakes. Remember, even the greatest Bondo masters started somewhere!
Q: Are there any safety precautions I should be aware of while using Bondo?
A: Safety first, oh seekers of DIY greatness! When working with Bondo, make sure to wear protective gear, such as gloves and a mask, as this magical paste can be an irritant to the skin and lungs. Additionally, always use Bondo in a well-ventilated area to avoid any pesky fume-induced headaches. Keep those safety goggles nearby too, because nobody wants Bondo debris in their eyes. So, keep calm, protect yourself, and unleash the Bondo wizard within!
Q: Can Bondo withstand the test of time?
A: Ah, the question of longevity! When applied correctly, Bondo can provide a reliable and durable repair that stands the test of time. It’s important to remember that Bondo is not designed to be a permanent solution for structural damage. However, for surface repairs and cosmetic upgrades, Bondo can be a true hero, offering years of reliable service. So go ahead, embrace the magical powers of Bondo and bid farewell to those unsightly dents and dings once and for all!
Remember, dear readers, the power of Bondo lies in your hands, so unleash your creativity and embark on your DIY adventures with confidence. You’ve got this!
Closing Remarks
As we bring this bondo adventure to a close, it is clear that the possibilities with this magical substance are as endless as your imagination. Whether you have restored a vintage car to its former glory or given new life to a cherished heirloom, the bondo filled your journey with incredible moments of transformation.
Remember, bondo is not just a fixing agent; it is a testament to the power of human ingenuity. With each swipe of the trowel, you have embodied the creativity and resourcefulness that make us who we are. So, celebrate your successes and embrace the imperfections that make your projects uniquely yours.
As you put the finishing touches on your latest masterpiece, take a moment to admire the seamless blending of surfaces, the hidden flaws no longer visible to the eye. In these quiet moments, let the bondo serve as a reminder that, much like in life, it is the imperfections that add character and beauty to the whole.
Now, armed with the knowledge of how to use a bondo, go forth and conquer the world of repairs and renovations. Let your hands dive fearlessly into the mixing container, your fingers glide across the surface, and your heart guide you through each repair. Remember, the bondo is merely a tool – it is your touch, your craftsmanship, and your vision that will bring true artistry to your projects.
So, fellow artisans, it is time to bid adieu. May your bondo adventures be filled with endless discoveries, remarkable repairs, and the unyielding spirit that can turn even the most damaged of objects into masterpieces. Embrace the bondo, embrace the power of creation, and may your journey always be filled with creativity and wonder. Farewell, until we meet again on the next chapter of your bondo-filled odyssey.


