
Copic markers have become a favorite tool among artists, illustrators, and craft enthusiasts for their exceptional quality and versatility. Whether you are a budding artist or a seasoned professional, understanding how to use Copic markers can greatly enhance your artwork and bring your creations to life. In this article, we will explore the ins and outs of these remarkable markers, providing you with practical tips, techniques, and insights on how to utilize Copic markers effectively. So, grab your markers and let’s delve into the fascinating world of Copic markers together.
Choosing the Right Copic Marker Set for Your Needs
<p>When it comes to using Copic markers, selecting the right set for your specific needs is crucial. With a wide range of options available, it can be overwhelming to decide which set will provide the best results for your artwork. Whether you are a beginner or a seasoned artist, there are a few factors to consider that can help you make an informed choice.</p>

<h3>1. Assess Your Artistic Style and Goals</h3>
<p>Before diving into the vast selection of Copic marker sets, take a moment to understand your own artistic style and goals. Are you primarily interested in coloring intricate illustrations or do you enjoy creating bold, vibrant artwork? Identifying your preferences will guide you towards the set that suits your needs best.</p>

<h3>2. Consider Your Budget</h3>
<p>Copic markers offer a wide price range, so it's important to establish a budget before making a purchase. Set a spending limit that aligns with your financial situation and prioritize your must-have markers accordingly. Remember that quality is key, and investing in a reputable brand like Copic can lead to superior results.</p>

<h3>3. Evaluate Color Range and Variety</h3>
<p>Copic marker sets come in both broad and specific color ranges. Consider the types of artwork you create and the colors you frequently use. If you often work with portraits, a set with a robust range of skin tones may be beneficial. Conversely, if you enjoy experimenting with a variety of subjects, a set that offers a diverse selection of colors might be more suitable.</p>

<h3>4. Assess the Marker Type</h3>
<p>Copic markers are available in various types, including Classic, Sketch, Ciao, and Wide. Each type offers unique features and benefits. The Classic markers are refillable and come with a broad nib and a fine nib, making them versatile for various uses. The Sketch markers have a flexible brush tip that allows for expressive strokes, while the Ciao markers are more compact and portable. The Wide markers, as the name suggests, have a broad tip for quick coverage. Choose a marker type that compliments your artistic technique and preferences.</p>

<h3>5. Read Reviews and Seek Recommendations</h3>
<p>Before finalizing your purchase, it can be helpful to read reviews and seek recommendations from other artists. Online communities and forums often provide valuable insights into the performance and durability of different Copic marker sets. Pay attention to feedback regarding color saturation, blending capabilities, and overall user experience to ensure your chosen set meets your expectations.</p>

Understanding the Different Types of Copic Markers
When it comes to creating vibrant and professional-looking artwork, Copic markers are the go-to choice for many artists. These high-quality markers have a range of features that make them versatile and easy to use. In this post, we will take a closer look at the different types of Copic markers available and how to use them effectively.
1. Copic Sketch Markers
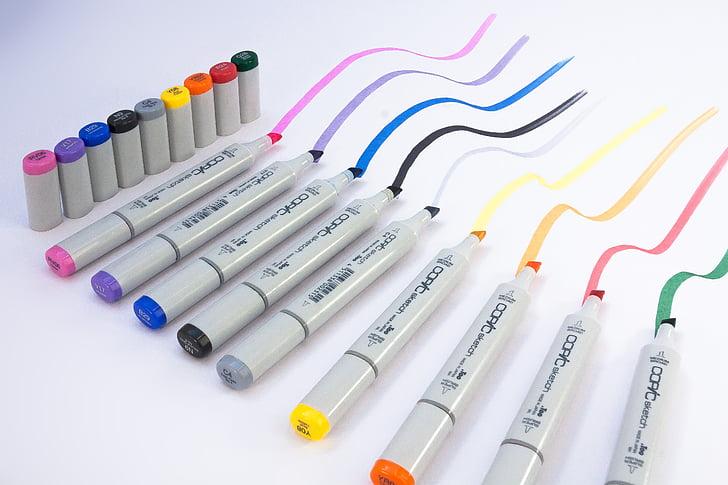
The Copic Sketch markers are the most popular choice among artists. They have a flexible and durable brush tip, perfect for creating beautiful brush strokes and blending colors seamlessly. The brush tip allows for various line widths, making it ideal for both detailed work and broader strokes. With over 350 colors available, you can create a wide range of vibrant and lifelike effects.
2. Copic Ciao Markers
Designed for beginners and students, Copic Ciao markers are budget-friendly without compromising on quality. They have a smaller barrel and a firm brush tip, making them comfortable to hold and control. These markers are available in over 180 colors, allowing you to experiment and create amazing artwork. Copic Ciao markers are a great starting point for artists looking to explore the world of Copic markers without breaking the bank.
3. Copic Classic Markers
The Copic Classic markers are the original Copic marker design and are widely used by professionals. These markers feature a broad chisel tip on one end and a fine bullet tip on the other, providing versatility for different drawing techniques. With 214 colors to choose from, you have a wide selection at your disposal. The refillable and replaceable ink system makes the Copic Classic markers a cost-effective option for artists who use markers frequently.
4. Copic Wide Markers
If you need to cover a large area quickly or create bold, expressive strokes, the Copic Wide markers are an excellent choice. These markers have a wide, angled chisel tip that allows for coverage over large surfaces. They are perfect for backgrounds, filling in spaces, and creating striking effects. The Copic Wide markers are available in 36 colors, providing you with a versatile range.
5. Copic Various Ink Refills
One of the defining features of Copic markers is their refillable ink system, making them a cost-effective choice in the long run. The Copic Various Ink refills are available in all 358 colors and can be used to replenish your markers. Simply remove the chisel tip from the marker and add a few drops of ink to keep your marker going. This feature ensures that you never run out of your favorite colors and helps reduce waste.
A Step-by-Step Guide to Blending and Layering with Copic Markers
Blending and Layering with Copic Markers
Once you’ve got a basic understanding of how to use Copic markers, the next step is to learn how to blend and layer with them. Blending and layering techniques can significantly enhance your artwork, allowing you to create smooth gradients and intricate details. Here is a step-by-step guide to help you master these techniques:
1. Choose your colors wisely
The key to successful blending and layering is choosing the right colors. Select shades that are either adjacent on the color wheel or have a similar intensity. This will create a harmonious and seamless transition between hues. You can also experiment with blending contrasting colors for an interesting effect.
2. Start with a light base color
Begin by laying down a base layer of the lighter shade in the desired area. Use light, feathery strokes to avoid any streaks or harsh lines. This initial layer will act as a foundation for the subsequent layers, providing a smooth canvas to work with.
3. Gradually build up the layers
Add a second layer of a slightly darker shade, overlapping it with the base color. Blend the two colors together using either a blending marker or by lightly overlapping the strokes. Repeat this process, gradually switching to darker shades, until you achieve the desired depth and dimension in your artwork.
4. Experiment with blending techniques
There are various blending techniques you can try to achieve different effects. One popular method is feather blending, where you use flicking or sweeping motions to blend the colors smoothly. Another technique is the tip-to-tip method, where you touch the tips of two markers together to transfer the lighter color onto the darker one.
5. Practice and refine
Mastering blending and layering with Copic markers takes practice. Don’t be discouraged if your first attempts don’t turn out as expected. Experiment with different colors, techniques, and tools to find what works best for you. Keep practicing and refining your skills, and you’ll soon be able to create stunning, professional-looking artwork.

Tips and Techniques for Achieving Realistic Coloring with Copic Markers
Creating realistic coloring with Copic markers requires a combination of techniques and tips that can help you achieve beautiful and lifelike results. Whether you’re a beginner or have some experience with these markers, here are some useful pointers to help you make the most out of your Copic markers:
1. Choose the Right Paper
Using the right paper is crucial when working with Copic markers. Opt for a smooth and heavyweight paper that can handle the ink without bleeding or feathering. A good quality marker paper or a Bristol board are excellent choices for achieving optimal results.
2. Start with Light Colors
Build up your coloring gradually by starting with lighter shades and gradually layering darker ones. This technique allows you to create depth and dimension in your artwork. Remember to use a gentle touch and let the ink dry between layers to avoid smudging.
3. Practice Effective Blending
Blending is a key technique when working with Copic markers. Experiment with different blending techniques, such as feathering, circular strokes, or using a colorless blender marker. Practice blending different colors together to create smooth transitions and gradients.
4. Take Advantage of Line Work
Using line work can enhance the realism of your coloring. Outline your images with a fine-tip pen or marker to add definition and details. You can also experiment with cross-hatching or stippling techniques to add texture and depth to your artwork.
5. Explore Color Combinations
Don’t be afraid to explore different color combinations to bring your drawings to life. Study color theory and experiment with various palettes. Complementary colors can create vibrant contrasts, while analogous colors can give a harmonious feel. Keep a color swatch chart or reference guide to help you select and organize your colors.
Maintaining and Caring for Your Copic Marker Collection
Cleaning Your Copic Markers
Properly cleaning and maintaining your Copic marker collection is essential to ensure their longevity and optimal performance. Here are some tips to help you keep your markers in top condition:
- Clean the tips regularly: After each use, wipe the marker tips gently with a clean paper towel or a lint-free cloth. This helps remove excess ink and prevents any buildup that might affect the flow of color.
- Store markers horizontally: Storing your Copic markers horizontally helps distribute the ink evenly and prevents it from settling at the bottom, ensuring consistent color output.
- Prevent cross-contamination: To avoid potential color mixing, avoid touching the tips of your markers together. If you accidentally have two different colors in contact, quickly clean them before continuing.
Keeping your Copic markers clean not only helps maintain their performance but also extends their lifespan, allowing you to continue creating stunning artwork with vibrant colors.
Refilling and Replacing Nibs
As you use your Copic markers regularly, you may find the need to refill them or replace their nibs. Here’s what you need to know:
- Refilling: Copic markers are refillable, allowing you to easily replenish their ink supply. Refer to the instruction manual or the manufacturer’s website to determine the appropriate refillable ink for your markers. Refilling is a simple process that can save you money in the long run by prolonging the lifespan of your markers.
- Nib replacement: Over time, marker nibs can wear out or become damaged. Fortunately, Copic provides replacement nibs that are easy to install. Remember to choose the correct nib size and type for your marker model.
- Proper disposal: When disposing of used ink cartridges or nibs, follow your local regulations for hazardous waste to ensure environmentally friendly disposal. Alternatively, consider recycling programs that may exist in your area.
By taking care of your Copic markers and regularly refilling or replacing their ink, you can continue enjoying their vibrant colors and smooth application for years to come.
Protecting Your Markers
To keep your Copic marker collection safe and well-protected, consider the following tips:
- Invest in a marker case: A marker case or organizer helps keep your markers organized and prevents them from rolling off your workspace. Many cases are specifically designed for Copic markers and provide a secure and compact storage solution.
- Avoid direct sunlight: Excessive exposure to sunlight can cause the colors of your markers to fade. Store them in a cool, dry place away from direct sunlight to maintain their vibrancy.
- Protect the caps: Always make sure the marker caps are securely fastened when not in use. This helps prevent the ink from drying out and extends the life of your markers.
By taking these precautionary measures, you’ll ensure your Copic markers remain in excellent condition, ready to bring your artistic visions to life.
Proper Marker Technique
While Copic markers are known for their versatility and ease of use, learning proper marker technique can help you achieve even better results. Here are a few tips to keep in mind:
- Avoid excessive pressure: Apply light and steady pressure to the marker tip. Using excessive force can damage the nib and cause uneven ink flow.
- Blend colors gradually: To achieve smooth and seamless blends, work with the lightest color first and gradually layer additional shades on top. Use feathering or circular motions to create a natural transition between colors.
- Practice on scrap paper: If you’re trying a new technique or color combination, it’s always a good idea to practice on scrap paper before applying it to your artwork. This allows you to test the colors and blending effects without any risk of mistakes on your final piece.
By mastering these techniques and incorporating them into your artistic process, you’ll unlock the full potential of your Copic markers and create stunning, professional-looking artwork.
Creating Your Personal Color Chart
To conveniently reference your Copic marker colors and create a color chart customized to your collection, follow these steps:
- Gather your markers: Organize your markers according to their color families.
- Prepare a chart template: Create a table with columns representing the marker numbers, color names, and swatches for each color family.
- Fill in the color information: Write down the marker numbers, color names, and create small swatches next to each entry by coloring a small square with the respective marker.
- Organize your chart: Arrange the color families in a logical order, such as by hue or shade, to make it easier to locate specific colors.
- Update your chart: As you add new markers to your collection, remember to update your color chart to keep it accurate and up to date.
Creating a personalized color chart allows you to easily identify the colors you have, plan your artwork more efficiently, and keep track of any markers you may want to add to your collection.
Q&A
Q: What are Copic markers?
A: Copic markers are high-quality, alcohol-based markers widely used by artists, designers, and illustrators for their versatility and vibrant colors.
Q: How are Copic markers different from other markers?
A: Unlike most markers, Copic markers contain alcohol-based ink, which allows for seamless blending and layering. They are also refillable, making them a more sustainable option for long-term use.
Q: What types of projects are Copic markers suitable for?
A: Copic markers are suitable for various art projects, such as illustrations, graphic design, coloring books, fashion design, architecture, and manga. They offer precise control and the ability to create smooth gradients and shading.
Q: Is it necessary to use a specific type of paper with Copic markers?
A: Yes, it is crucial to use a paper specifically designed for alcohol-based markers. The best choices include bleed-proof and heavyweight papers, which prevent the ink from bleeding through and provide optimal blending.
Q: How do I choose the right colors when starting with Copic markers?
A: Copic markers come in a wide array of colors. It’s recommended to start with a basic set that includes a variety of shades in essential primary colors. Over time, you can expand your collection to suit your specific needs.
Q: What is the best way to blend colors using Copic markers?
A: To blend colors with Copic markers, start with light colors and gradually layer darker shades. Use a light touch and create gentle overlapping strokes to create smooth transitions. Experiment with the colorless blender to achieve more subtle blending and to correct mistakes.
Q: Can I refill my Copic markers?
A: Yes, Copic markers are refillable. They have replaceable ink cartridges, which helps reduce waste and extends the lifespan of your markers. Refilling the markers is a straightforward process that can save you money in the long run.
Q: Can I mix Copic marker colors to create new shades?
A: Absolutely! Copic markers can be mixed on the surface or even directly within the marker. Experimenting with different color combinations can lead to unique hues and tones, allowing you to expand your creative possibilities.
Q: How long does it take for Copic markers to dry?
A: Copic markers dry relatively quickly due to their alcohol-based ink formula. However, drying time can vary depending on paper type, humidity, and the amount of ink applied. Generally, the colors will dry within a few seconds to a couple of minutes.
Q: Are Copic markers permanent once they are dry?
A: Yes, once the Copic markers are dry, they become permanent and will not smudge or smear easily. This makes them suitable for projects that require long-lasting and fade-resistant results.
Q: Any additional tips for using Copic markers?
A: Remember to store your Copic markers horizontally to keep the ink evenly distributed. Avoid using Copic markers on non-archival surfaces, as the ink may bleed or fade over time. Lastly, practice and experimentation are key to mastering the full potential of Copic markers. In conclusion, Copic markers are undoubtedly versatile tools that can elevate your artwork to new heights. With their impressive color range, exceptional blending capabilities, and long-lasting ink, they are a favorite among artists and crafters alike. By understanding the various features and techniques discussed in this article, you can unlock the full potential of your Copic markers.
Remember to choose the right paper to optimize your results and always store your markers properly to extend their lifespan. Experimenting with different layering techniques, shading methods, and color combinations will allow you to create breathtaking effects and bring your artwork to life. Practice and patience are key to mastering the art of using Copic markers, so don’t be discouraged if it takes time to achieve the desired outcome.
Whether you’re a professional artist or an enthusiastic hobbyist, these markers offer endless possibilities for creativity. So go ahead, unleash your imagination, and let your Copic markers be your trusted companion on your artistic journey. With dedication and a steady hand, you’re bound to create stunning pieces that will impress and inspire others. So grab your Copic markers, embrace the world of colors, and let your creativity flow!


