
Adobe Photoshop is a powerful and widely-used software that has revolutionized the world of digital imaging. With its plethora of features and endless creative possibilities, it has become the industry standard for graphic designers, photographers, and artists alike. In this article, we will provide a comprehensive guide on how to effectively utilize Adobe Photoshop, covering essential tools, techniques, and workflows. Whether you are a beginner looking to explore the software or a seasoned user aiming to enhance your skills, this is the ultimate resource to master the art of digital image editing.
Basics of Adobe Photoshop: Understanding the Interface and Tools
Adobe Photoshop is a powerful software widely used for photo editing, graphic design, and digital art creation. To fully utilize this tool, it is important to understand the interface and familiarize yourself with the various tools at your disposal. In this post, we will walk you through the basics of Adobe Photoshop, helping you navigate the interface and make the most of its tools.
-
Interface: When you launch Adobe Photoshop, you are greeted with a sleek and organized interface. At the top, you will find the menu bar with options like File, Edit, Image, and more. Just below that, you have the options bar, which displays context-sensitive tools and settings based on the active tool. The main working area is the canvas, where you can edit and create images. On the right-hand side, you will find panels such as Layers, Adjustments, and History, which provide additional functionality and options for editing.
-
Tools: Adobe Photoshop offers a wide range of tools that you can use to manipulate images and create stunning visuals. Some essential tools include the Move tool, which allows you to move and reposition elements on the canvas; the Marquee tool, which helps you make selections of specific shapes; and the Brush tool, which enables you to paint and draw on the canvas. Other tools like the Eraser, Clone Stamp, and Gradient also come in handy for various editing tasks.
-
Panels: Alongside the main canvas, panels in Adobe Photoshop provide additional functionality and customization options. The Layers panel is vital for managing different layers within a document, allowing you to rearrange, hide, or add new layers. The Adjustments panel offers a wide range of options to fine-tune your images by adjusting levels, curves, brightness, and contrast. The History panel keeps track of your editing process, allowing you to go back to previous states of your work. These panels, among others, can be opened or closed as needed, giving you flexibility in your workspace.
-
Using Shortcuts: To speed up your workflow and improve efficiency, Adobe Photoshop provides numerous keyboard shortcuts that can be used to quickly access tools and commands. For example, pressing the letter “V” on your keyboard activates the Move tool, while pressing “B” switches to the Brush tool. Some other useful shortcuts include Ctrl+Z (Command+Z on Mac) for undoing actions and Ctrl+S (Command+S on Mac) for saving your work. By familiarizing yourself with these shortcuts, you’ll be able to work faster and more efficiently.
-
Customization: One of the great advantages of Adobe Photoshop is its ability to be customized according to your preferences and needs. You can change the interface color, rearrange panels, and create your own workspace layout. Additionally, you can save your favorite and most frequently used tools as presets, making them easily accessible whenever you open Photoshop. By customizing the interface and creating personalized presets, you can tailor Adobe Photoshop to suit your specific workflow and increase your productivity.
In conclusion, understanding the interface and tools of Adobe Photoshop is crucial for effectively using this powerful software. By familiarizing yourself with the interface elements, exploring the various tools and panels, utilizing shortcuts, and customizing the software to suit your needs, you’ll be on your way to creating stunning visuals and mastering the art of Adobe Photoshop.

Mastering Essential Photoshop Techniques: Layers, Filters, and Masks
Adobe Photoshop is a powerful tool widely used by graphic designers, photographers, and artists to create and edit stunning visuals. In order to make the most out of this software, it’s essential to understand and master some of its key features like layers, filters, and masks. These three techniques are fundamental to creating professional-looking images and designs in Photoshop.
1. Layers: Layers are like transparent sheets stacked on top of each other, allowing you to work on different elements of an image independently. With layers, you can easily adjust, move, or apply effects to specific parts of your design without affecting the rest. Take advantage of layer blending modes to create unique visual effects or experiment with opacity to achieve a desired level of transparency.
2. Filters: Filters are a quick and effective way to enhance your images or add artistic effects. Photoshop offers a wide range of filters to choose from, including blurs, distortions, and stylizations. Apply filters to individual layers or the entire image to transform your work. Don’t be afraid to experiment and combine different filters to achieve the desired look.
3. Masks: Masks allow you to hide or reveal parts of a layer, giving you precise control over which areas are affected by your edits. Create a layer mask to selectively apply adjustments, filters, or brush strokes. Use the brush tool with varying opacities and brush sizes to refine your mask and achieve seamless blending between different elements of your design.
4. Workflow Tips: To work efficiently in Photoshop, it’s important to adopt good workflow habits. Organize your layers by naming them appropriately and group related layers to keep your project tidy. Make use of adjustment layers to apply non-destructive edits and easily make changes later on. Utilize shortcuts to speed up your workflow and take advantage of Photoshop’s robust capabilities.
| Shortcut | Description |
|---|---|
| Ctrl + J | Duplicate layer |
| Ctrl + Alt + Z | Step backward in History |
| Ctrl + E | Merge layers |
5. Practice and Experiment: The best way to become proficient in Photoshop is through practice and experimentation. Take the time to explore different features, tools, and techniques. Follow tutorials, engage with online communities, and challenge yourself to recreate or create unique designs. The more you practice, the more you’ll develop your skills and creativity with Adobe Photoshop.

Enhancing Photos with Adobe Photoshop: Color correction and Retouching
Adobe Photoshop is a powerful tool that can greatly enhance your photos. In this post, we will focus on two important aspects of photo editing: color correction and retouching. These techniques will help you bring out the best in your images and make them truly stand out.
Color correction is an essential step in the photo editing process. It allows you to adjust the colors in your image to create a more pleasing and balanced result. One effective way to correct colors is by using the “Curves” adjustment tool in Photoshop. This tool allows you to individually tweak the brightness and contrast of different color channels, such as red, green, and blue. Experiment with these adjustments to achieve the desired look for your photo.
In addition to color correction, retouching is another key aspect of photo editing. It involves removing imperfections, enhancing features, and adding subtle effects to make your photo look flawless. One common retouching technique is the use of the ”Spot Healing Brush” tool. This tool enables you to quickly and effortlessly remove blemishes, wrinkles, or any other unwanted marks from your photo. Simply select the tool, adjust the brush size, and click on the areas you wish to retouch.
Another useful tool for retouching is the ”Clone Stamp” tool. This tool allows you to duplicate a selected area of your photo and blend it seamlessly with the rest of the image. It’s perfect for fixing minor imperfections or removing distracting elements. By sampling an area, you can easily clone and cover the undesired parts of your photo, creating a cleaner and more polished result.
When working with portraits, it’s essential to highlight the subject’s best features. One effective way to achieve this is by enhancing the eyes. In Photoshop, you can use the “Dodge” and “Burn” tools to add depth and definition to the eyes. With the “Dodge” tool, you can brighten specific areas, such as the iris and whites of the eyes. Conversely, the “Burn” tool allows you to darken the outer corners and create a more dramatic effect. These simple adjustments can make a significant difference in the overall appearance of your portrait.
Finally, it’s important to remember that practice makes perfect. Adobe Photoshop offers a wide range of tools and features, so take your time to explore and experiment. Don’t be afraid to try different techniques and create your unique editing style. With persistence and creativity, you’ll soon be able to enhance your photos like a pro using Adobe Photoshop. So, embrace the power of this software, and let your imagination run wild!
Creating Stunning Graphics with Adobe Photoshop: Typography, Shapes, and Effects
In today’s digital era, creating stunning graphics is essential to grab the attention of your audience. One of the most popular tools used by professionals for graphic designing is Adobe Photoshop. With its wide range of features and tools, you can easily create beautiful and eye-catching designs. In this post, we will explore how to use Adobe Photoshop to create stunning graphics with a focus on typography, shapes, and effects.
Typography is a crucial element in graphic design, as it helps convey your message effectively. Adobe Photoshop offers a plethora of font options, allowing you to experiment with different styles, sizes, and colors. To create visually appealing typographic designs, you can combine various fonts and use different text effects, such as drop shadows or bevels. These effects add depth and dimension to your text, making it stand out. Play around with different font combinations, alignments, and spacing to create a visually pleasing and readable typography design.
Shapes are another powerful feature in Adobe Photoshop that can enhance your designs. With the shape tools provided, you can easily create geometric shapes, icons, or custom shapes as per your requirements. Utilizing shape layers, you can apply various effects like gradients, strokes, and shadows to add depth and visual interest to your designs. Consider incorporating shapes into your typography designs to create a well-balanced composition.
Adding effects to your graphics can elevate their visual appeal. Adobe Photoshop offers a wide range of effects, including filters, blending modes, and layer styles. Filters allow you to apply different artistic or stylistic effects to your images or text layers. Blending modes enable you to blend multiple layers together, creating unique and captivating outcomes. Layer styles provide a quick and easy way to add various effects like drop shadows, glows, bevels, and gradients to your layers. Experiment with different effects to enhance the overall look of your designs.
To make your graphics even more interesting, you can try utilizing advanced techniques in Adobe Photoshop. One such technique is image manipulation, where you can blend multiple images to create a fantastic visual composition. You can also experiment with textures and patterns to add depth and realism to your designs. Another useful technique is the use of masks, which help you selectively apply effects or edits to specific areas of your design. These advanced techniques can take your designs to the next level and make them truly stunning.
In conclusion, Adobe Photoshop is a powerful tool for creating stunning graphics. By leveraging its features, such as typography options, shape tools, effects, and advanced techniques, you can create visually appealing designs that captivate your audience. Remember to experiment, be creative, and explore new possibilities to unleash your full potential with Adobe Photoshop.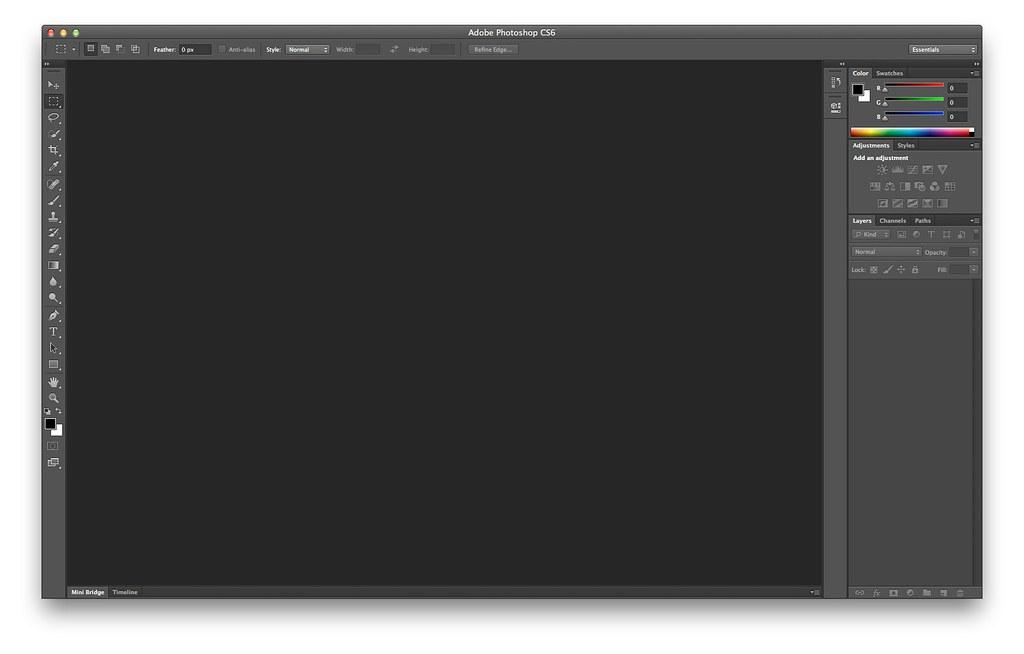
Advanced Tips and Tricks for Adobe Photoshop: Smart Objects, Actions, and Batch Processing
When it comes to Adobe Photoshop, there are a plethora of advanced tips and tricks that can take your editing skills to the next level. In this post, we will explore three powerful features: Smart Objects, Actions, and Batch Processing. These tools are essential for any Photoshop enthusiast looking to streamline their workflow and boost productivity.
Smart Objects
Smart Objects are a handy feature in Photoshop that allow you to work non-destructively. By converting a layer into a Smart Object, you can apply filters, transformations, and adjustments that can be modified at any time. This means that you retain the original image quality and can make changes without losing any information. To create a Smart Object, simply right-click on a layer and select “Convert to Smart Object”.
One of the biggest advantages of using Smart Objects is their ability to preserve vector-based elements. This makes them extremely useful when working with logos, icons, or any other scalable graphics. Additionally, Smart Objects can be linked across multiple Photoshop documents, allowing you to update the content in one place and have it automatically reflect in all linked instances.
When applying filters or adjustments to a Smart Object, Photoshop creates a separate layer mask for each effect. This gives you the flexibility to fine-tune the appearance by editing or disabling individual masks. It’s a fantastic way to experiment with different effects while maintaining full control over each change you make. By utilizing Smart Objects effectively, you can speed up your editing process and maintain a professional workflow.
Actions
Actions are a recordable sequence of steps in Photoshop that can be saved and played back on multiple images. This feature is particularly helpful when you need to apply the same edits to a batch of photos. To create an action, go to the “Window” menu and select “Actions” to open the Actions panel. Click on the “New Action” button, provide a name, and start recording your desired steps.
Actions can be as simple as resizing and watermarking images or as complex as creating intricate digital art. By using Actions, you can automate repetitive tasks and save a significant amount of time. You can also assign keyboard shortcuts to specific Actions, making them easily accessible for quick editing adjustments.
To apply an Action to multiple images, go to “File” > “Automate” > “Batch”. Select the desired Action, choose the folder containing the images, and specify where the processed files should be saved. Adjust any additional settings based on your requirements, such as file format or destination folder. Photoshop will then process each image using the recorded Action, leaving you with consistent edits across your entire batch.
Batch Processing
Batch Processing is another feature in Adobe Photoshop that can greatly enhance your productivity. With Batch Processing, you can automate repetitive tasks on a large number of files simultaneously. This can include anything from resizing images to applying filters or converting file formats.
To utilize Batch Processing, select “File” > “Automate” > “Batch”. Choose the desired action from the dropdown menu or create a new one. Select the source folder containing the files you want to process. Choose the destination folder for the processed files, and adjust any additional settings as needed. Once configured, Photoshop will automatically perform the specified action on all the selected files, saving you valuable time and effort.
It’s important to note that Batch Processing should be used with caution, especially when applying complex edits or effects. Make sure to preview the results on a few sample images before processing the entire batch to ensure the desired outcome. By mastering Batch Processing, you can streamline your workflow and unlock a new level of efficiency.
Conclusion
Smart Objects, Actions, and Batch Processing are powerful tools within Adobe Photoshop that can revolutionize your editing process. By harnessing their capabilities, you can work more efficiently, maintain better control over your edits, and achieve consistent results across multiple images.
Remember to experiment and practice with these features to fully grasp their potential. As you become more comfortable with Smart Objects, Actions, and Batch Processing, you’ll find yourself amazed at the time and effort they can save you in your creative endeavors.
Q&A
Q: What is Adobe Photoshop and what is it used for?
A: Adobe Photoshop is a versatile software program commonly used for photo editing and graphic design. It allows users to manipulate images, enhance colors, and apply various effects to create stunning visuals.
Q: How do I install Adobe Photoshop?
A: To install Adobe Photoshop, you need to visit the Adobe website and choose a subscription plan that suits your needs. Once subscribed, you can download and install the software onto your computer.
Q: Is Adobe Photoshop difficult to learn for beginners?
A: Adobe Photoshop has a steep learning curve, but with dedicated practice, beginners can grasp its fundamentals. Utilizing online tutorials, taking courses, and exploring the vast array of available resources will greatly facilitate the learning process.
Q: How can I import an image into Adobe Photoshop?
A: Within Photoshop, click on the “File” menu and select “Open”. Browse your computer to find the desired image file, select it, and click on “Open”. The image will then open in the Photoshop workspace for further editing.
Q: What are some basic editing tools available in Adobe Photoshop?
A: Adobe Photoshop offers a wide range of editing tools, including but not limited to: crop, resize, clone stamp, healing brush, dodge and burn, and adjust brightness/contrast. These tools can be accessed from the toolbar on the left side of the screen.
Q: Can I undo changes made in Adobe Photoshop?
A: Yes, Adobe Photoshop allows you to undo or revert changes made to your image. Simply click on the “Edit” menu and select “Undo” or use the shortcut keys Ctrl+Z (Windows) or Command+Z (Mac) to reverse the last action. Additionally, the software provides a history panel that allows you to jump back to any previous step.
Q: How can I save my edited image in Adobe Photoshop?
A: To save your edited image, click on the “File” menu and select “Save” or “Save As”. Choose a file format (such as JPEG or PNG) and specify the desired location on your computer to save the file. It is recommended to save your work in a high-quality format to preserve image quality.
Q: Can Adobe Photoshop be used for creating illustrations or digital artwork?
A: Absolutely! Besides photo editing, Adobe Photoshop is widely used for creating digital art, illustrations, and designs. It provides an extensive array of tools, brushes, and effects that enable artists to digitally sketch, paint, and bring their creative ideas to life.
Q: How can I learn more about advanced techniques in Adobe Photoshop?
A: To explore more advanced techniques in Adobe Photoshop, you can consider enrolling in online courses, participating in workshops, or joining Photoshop communities and forums. Additionally, Adobe offers official documentation, tutorials, and webinars that cover advanced topics to help you elevate your skills.
Q: Can Adobe Photoshop be used on mobile devices?
A: Yes, Adobe Photoshop offers a mobile app called “Adobe Photoshop Express” for both iOS and Android devices. Although it doesn’t provide the full range of functionalities as the desktop version, it allows you to perform basic edits and apply filters to your photos conveniently on the go. In conclusion, mastering Adobe Photoshop can open up a world of creative possibilities for both amateur and professional photo editors alike. By familiarizing yourself with the essential tools, understanding the importance of layers, and exploring various techniques, you can elevate your images to the next level. Remember to experiment and practice regularly, as Photoshop offers a vast array of features and options that can be tailored to suit your individual style and preferences. Whether you aspire to retouch photographs, create stunning digital art, or design captivating graphics, this powerful software will undoubtedly be your go-to tool. So, dive into the realm of Adobe Photoshop and unleash your creativity today!


