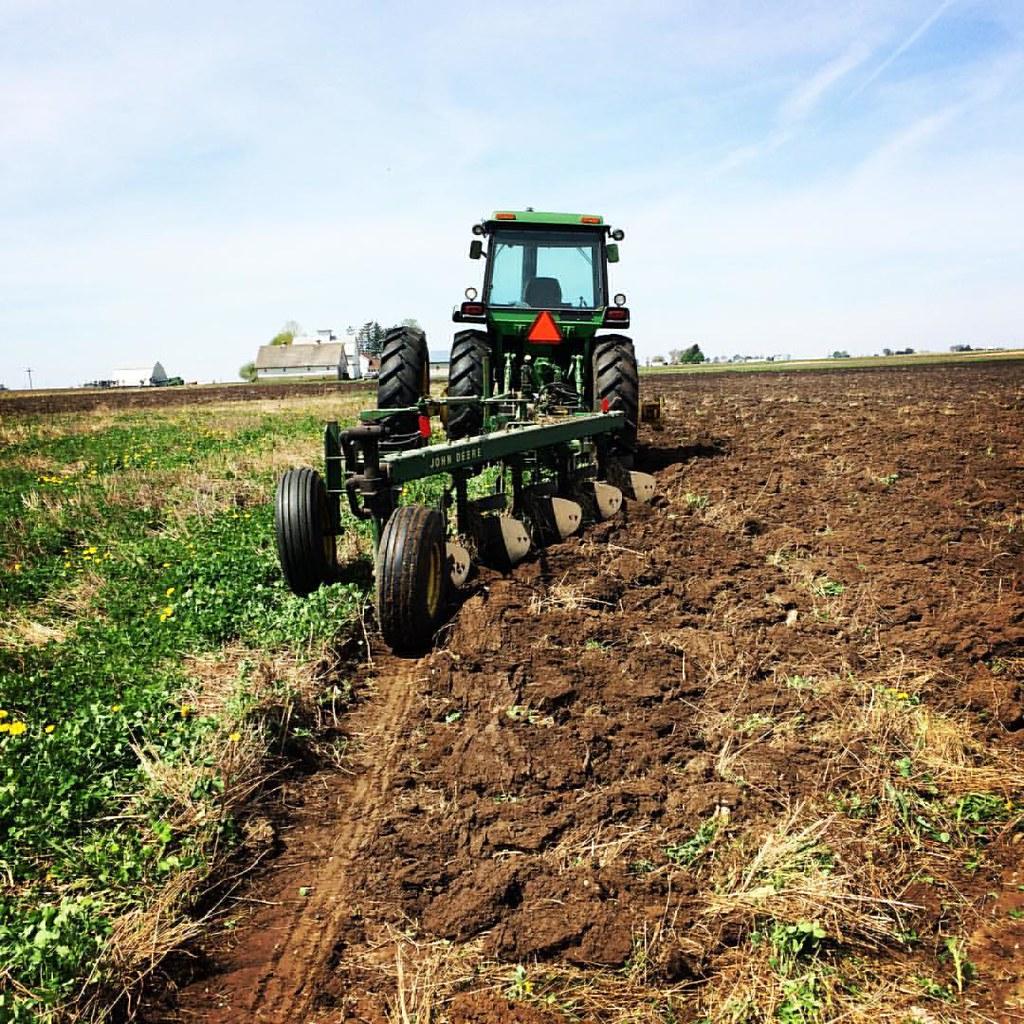
The moldboard plow has been an essential tool for farmers for centuries, facilitating the preparation of soil and improving crop yields. Designed to turn over and completely bury soil, it efficiently cuts through unbroken ground and incorporates organic matter to enhance fertility. If you’re new to agriculture or seeking to master the art of plowing, this article will guide you through the process of using a moldboard plow effectively. From understanding the various components to adjusting the plow for different soil conditions, we will explore the efficient techniques and best practices to maximize the productivity of your land. Whether you’re a seasoned farmer or aspiring to develop your agricultural skills, this comprehensive guide will equip you with the knowledge and expertise needed to master the art of using a moldboard plow.
Choosing the Right Moldboard Plow for Your Needs
When it comes to tilling and preparing your land for planting, a moldboard plow can be an invaluable tool. However, with so many options available on the market, it can be overwhelming trying to choose the right one for your specific needs. In this guide, we will help you navigate through the various factors to consider when selecting a moldboard plow, ensuring that you make an informed decision that will suit your requirements and maximize efficiency.
1. Size and Weight
One of the first things to consider when choosing a moldboard plow is the size and weight. The plow should be suitable for the size of your land and the tractor or equipment you will be using. If the plow is too heavy for your machinery, it will put unnecessary strain on the drive components and may reduce performance. Similarly, if it’s too small, it may not be able to effectively till your land.
2. Material Quality
Another important factor to consider is the quality of the materials used in the construction of the moldboard plow. You want to invest in a plow that is made from durable and corrosion-resistant materials to ensure its longevity and reliability. Look for plows made from high-quality steel or hardened alloys. Taking the time to choose a plow with good material quality will result in fewer maintenance issues and a longer lifespan.
3. Adjustable Depth
The ability to adjust the depth of a moldboard plow is crucial, as it allows you to adapt to different soil conditions and crop requirements. Look for a plow that offers easy and precise depth adjustment mechanisms, such as adjustable skids or wheels. This will give you the flexibility to till the soil to the desired depth, ensuring optimal seedbed preparation for planting.
4. Moldboard Design
The design of the moldboard plays a significant role in determining the plow’s performance. Look for moldboards that are specifically designed for your soil type. Moldboards with a larger curvature are better suited for heavy clay soils, while those with a smaller curvature are more suitable for light and sandy soils. Consider your soil type and choose a moldboard design that will promote efficient and effective soil turning.
5. Ease of Maintenance
No one wants to spend excessive time and effort maintaining their equipment. Therefore, it’s essential to choose a moldboard plow that is easy to maintain. Look for features such as easily replaceable wear parts and grease fittings for convenient lubrication. Additionally, consider the availability of spare parts and technical support for the specific plow make and model you are considering.
By considering these factors when selecting a moldboard plow, you can ensure that you choose the right equipment for your needs. Remember, an informed decision will lead to improved efficiency and productivity, ultimately contributing to a successful and prosperous farming season.

Preparing the Field and Equipment for Moldboard Plow
Once you are ready to use a moldboard plow, it’s important to properly prepare the field and equipment to ensure a smooth and efficient plowing process. Here are some steps you can take to get everything ready:
-
Field Preparation:
- Begin by removing any rocks, debris, or other obstacles from the field. This will help prevent damage to the plow and ensure a clean plow line.
- Use a harrow or disc to break up any large clumps of soil and level the field. This will promote even plowing and avoid uneven furrows.
- Consider testing the soil moisture content to ensure it is suitable for plowing. If the soil is too wet, plowing can lead to compaction and poor seedbed conditions.
-
Equipment Inspection:
- Before using the moldboard plow, thoroughly inspect it for any signs of damage or wear. Check the plowshare, moldboard, and other components for cracks or excessive wear.
- Ensure that the plow is properly adjusted and aligned. This includes checking the depth wheel setting, ensuring the moldboard pitch is correct, and adjusting the plow height as needed.
- Lubricate all moving parts of the plow to reduce friction and allow for smooth operation. Pay special attention to the pivot points and coulters, if applicable.
-
Plow Set-Up:
- Attach the moldboard plow to your tractor, making sure it is securely fastened. Follow the manufacturer’s instructions for proper installation.
- Adjust the plow’s hitch position to achieve the desired cut width and depth. This will depend on the specific requirements of your field and crop.
- If using a multiple plow setup, ensure that all plows are evenly spaced and aligned to avoid uneven furrows.
-
Safety Precautions:
- Always prioritize safety when operating a moldboard plow. Wear appropriate personal protective equipment (PPE), such as sturdy work boots and eye protection.
- Keep bystanders a safe distance away from the plowing area to avoid accidents or injuries. Clear the field of any livestock or obstacles that may accidentally come in contact with the plow.
- Be cautious of hidden utility lines or pipelines that may be buried in the field. Contact your local utility companies to mark out these areas before plowing.
-
Post-Plowing Maintenance:
- After plowing, inspect the plow for any damage or excessive wear. Replace any worn parts before storage to avoid issues in future uses.
- Clean the plow thoroughly to remove any soil or debris that may have accumulated during plowing. This will prevent rust and extend the life of the equipment.
- Store the plow in a dry and secure location to protect it from the elements. Consider applying a protective coating or rust inhibitor to further preserve the equipment.
By properly preparing the field and equipment before using a moldboard plow, you can ensure a successful plowing operation and maximize your chances of achieving optimal seedbed conditions for planting. Remember to always follow the manufacturer’s guidelines and prioritize safety throughout the process. Happy plowing!
Proper Techniques for Operating a Moldboard Plow
A moldboard plow is a highly efficient agricultural tool used for deep plowing and turning over the soil to prepare it for planting crops. are essential to ensure maximum effectiveness and minimize any potential damage to the plow or the soil. Here are some important guidelines to follow when using a moldboard plow:
- Understand the Different Parts:
- Coulter: This small circular blade located at the front of the plow helps cut through vegetation and loosen the soil before the moldboard comes into action.
- Moldboard: The curved metal plate behind the coulter that lifts and turns the soil as the plow moves forward.
- Share: This sharp, triangular blade is connected to the moldboard and assists in breaking up the soil.
- Set the Plow Correctly:
- Adjust the plow’s depth according to the type of soil and the desired depth of plowing. In general, a shallower setting is suitable for lighter soils, while deeper plowing may be necessary for clay or compacted soil.
- Make sure the plow is level and balanced for optimal performance. Uneven weight distribution can cause the plow to dig too deep on one side and too shallow on the other.
- Operate at the Right Speed and Angle:
- Maintain a constant speed while operating the plow. Too fast can result in poor soil turnover, while too slow can cause excessive soil clods.
- Always align the plow at a slight angle to the direction of travel. This angle, known as the “landside slope,” ensures that the plowed furrow is clear of any unturned soil.
- Watch for Warning Signs:
- Pay attention to the color and texture of the soil being turned. If it is excessively wet or compacted, it may be a sign that further soil preparation is required before plowing.
- Monitor the condition of the moldboard and share throughout the operation. Replace or repair damaged parts promptly to maintain optimal plowing performance.
- Take Care of your Plow:
- Clean the plow thoroughly after each use to prevent the buildup of debris, which can affect its performance and longevity.
- Regularly inspect and lubricate moving parts to ensure smooth operation.
- Store the plow in a dry and secure location when not in use to prevent rust or damage.
By following these , you can effectively till your fields and create an ideal seedbed for planting. Remember to always prioritize safety and equipment maintenance to achieve the best results while minimizing any potential issues. Happy plowing!
Adjustments and Maintenance for Optimal Plowing Results
Using a moldboard plow is an effective way to prepare your land for planting. To ensure optimal plowing results, it is essential to make necessary adjustments and conduct regular maintenance. Proper adjustments and maintenance not only enhance the performance of the plow but also extend its lifespan. In this post, we will discuss some key adjustments and maintenance tips for achieving the best plowing results with a moldboard plow.
-
Adjusting the Plow Depth: The depth at which the plow cuts into the soil determines the effectiveness of the plowing. Depending on the soil conditions and the type of crop you plan to grow, you may need to adjust the plow depth. Shallow plowing is suitable for lighter soils, while deeper plowing is necessary for heavy clay soils. By adjusting the plow’s depth, you can ensure that the soil is properly turned and adequately prepared for planting.
-
Checking the Plowshare and Moldboard: The plowshare and moldboard are the key components of a moldboard plow. Regularly inspect these parts for any damage or excessive wear. Replace any worn-out or damaged parts to maintain optimal performance. Properly sharpen the plowshare to ensure it cuts through the soil effectively. Additionally, make sure the moldboard is positioned correctly to provide the desired turning effect.
-
Lubricating Moving Parts: A moldboard plow consists of various moving parts that require lubrication to operate smoothly. Regularly grease the hinges, pivot points, and other movable components to reduce friction and prevent premature wear. Lubrication also helps to prevent rust formation, extending the lifespan of the plow. Always refer to the manufacturer’s guidelines or the plow’s user manual for the recommended lubricant and lubrication points.
-
Inspecting and Adjusting Coulter Blades: Coulter blades are optional but highly beneficial attachments to a moldboard plow. They help cut through crop residues and vegetation before the plowshare enters the soil. Inspect the coulter blades for sharpness and make sure they are properly aligned with the plowshare. Adjust the blades if needed to ensure clean cutting and avoid any clogging or plowing inefficiency.
-
Maintaining a Level Plow: Plowing in a straight line is crucial for achieving consistent depth and furrow alignment. To maintain accuracy, regularly check and adjust the plow’s hitch height and horizontal alignment. Properly align the plow with the tractor’s hitch point to prevent unnecessary side tilting. A level plow not only improves plowing efficiency but also ensures an even distribution of soil across the field.
By following these adjustments and maintenance tips, you can maximize the performance and longevity of your moldboard plow. Remember to always observe safety precautions and refer to the manufacturer’s guidelines for specific recommendations. With proper care, your moldboard plow will provide you with the optimal results you desire, making the process of preparing your land for planting a breeze.
Safety Considerations When Using a Moldboard Plow
Moldboard plows are powerful tools that can be incredibly useful when it comes to tilling large areas of land. However, it is important to prioritize safety when using a moldboard plow to prevent accidents and injuries. Here are some key safety considerations to keep in mind:
1. Proper Attire
Wearing the appropriate clothing and protective gear is crucial when operating a moldboard plow. Make sure to wear sturdy work boots, gloves, and safety glasses to protect yourself from flying debris. Additionally, avoid loose-fitting clothing that can get caught in the machinery. It is also advisable to wear ear protection to minimize the risk of hearing damage due to the loud noise produced by the plow.
2. Pre-Use Inspection
Before using a moldboard plow, always conduct a thorough inspection of the machine. Check for any signs of damage, loose parts, or worn-out components that may compromise its safety and performance. Ensure that all safety features, such as shields and guards, are securely in place and functioning correctly. In case of any irregularities, refrain from using the plow until the necessary repairs have been made.
3. Know Your Surroundings
Be aware of your surroundings and identify potential hazards before operating the moldboard plow. Look out for obstacles, such as rocks, stumps, or buried objects, which could damage the plow or cause it to bounce and become unstable. Avoid operating the plow near fences, buildings, or other structures to minimize the risk of accidental collisions. Additionally, be cautious of overhead power lines and keep a safe distance to prevent electrical accidents.
4. Plan for Non-Operators
When using a moldboard plow, it is important to consider the safety of individuals who are not directly involved in the operation. Ensure that there is a safe distance between bystanders, including pets and children, to avoid any accidents caused by flying debris or moving machinery. Communicate your intentions clearly and establish a designated area where non-operators should stay during plowing activities to maintain a safe working environment.
5. Proper Shutdown and Maintenance
After completing your plowing tasks, remember to follow proper shutdown procedures to ensure safety. Turn off the plow and allow the moving parts to come to a complete stop before dismounting or performing any maintenance. Clean the plow thoroughly and remove any lodged debris to prevent potential damage and malfunctions. Additionally, maintain your moldboard plow regularly by inspecting and lubricating the components as recommended by the manufacturer to extend its lifespan and ensure safe operation.
Q&A
Q: What is a moldboard plow?
A: A moldboard plow is a farm tool used for primary tillage. It consists of a large, curved metal plate called a moldboard, which is attached to a frame and pulled behind a tractor or a draft animal.
Q: Why would I need to use a moldboard plow?
A: Moldboard plows are used to break up and turn over soil in preparation for planting crops. They are especially effective in breaking through compacted soil, removing weeds, and burying crop residues.
Q: How do I prepare the moldboard plow for use?
A: Before using a moldboard plow, ensure that it is in good working condition. Check the moldboard for any damage or excessive wear. Make sure all bolts and connections are properly tightened and lubricate any moving parts as necessary.
Q: What are the basic steps to using a moldboard plow?
A: First, adjust the plow’s depth gauge to achieve the desired plowing depth. Then, choose the proper plow size and attach it securely to the tractor or draft animal. Start plowing by lowering the moldboard into the soil and adjusting the angle of the plow to control the depth and width of the furrow. Finally, maintain a consistent speed and straight line while plowing.
Q: Are there any safety precautions I should take when using a moldboard plow?
A: Yes, safety should always be a priority. Ensure that all bystanders are a safe distance away from the plowing area. Always wear appropriate protective gear such as sturdy boots, gloves, and eye protection. Be cautious of any underground cables or pipes that may be present and avoid operating the plow on steep slopes or in hazardous conditions.
Q: How can I optimize the performance of a moldboard plow?
A: Make sure you adjust the plow properly, taking into consideration the soil type and condition. Regularly maintain and sharpen the moldboard for efficient plowing. Additionally, taking breaks to clean any accumulated debris from the moldboard will improve its performance.
Q: After using a moldboard plow, what should I do?
A: Once you’ve finished plowing, it’s important to properly clean and store your moldboard plow. Use a wire brush to remove any dirt or debris, paying attention to the moldboard and coulters. Lubricate all moving parts and store the plow in a dry and secure location to prevent rust or damage.
Q: Are there any alternatives to using a moldboard plow?
A: Yes, there are alternative tillage methods such as disc plowing, chisel plowing, or minimum tillage. Each has its advantages and specific applications. The choice of tillage method depends on factors including soil characteristics, crop rotation, erosion control, and conservation practices.
Q: Where can I find more information on using a moldboard plow?
A: You can refer to agricultural extension offices, online resources, or consult with local farmers who have experience in using moldboard plows. Additionally, manufacturers or suppliers of farming equipment often provide detailed manuals and instructions for their specific moldboard plows. In conclusion, learning how to use a moldboard plow can be a valuable skill for farmers, gardeners, and anyone who wants to effectively prepare their land for planting. This traditional tool may have been around for centuries, but its capabilities have not diminished. By following the step-by-step instructions outlined in this article and considering the important factors mentioned, you can ensure a successful plowing experience.
Remember, mastering the art of using a moldboard plow requires patience and practice. Take the time to familiarize yourself with the plow’s components, understand the optimal soil conditions, and adjust your technique accordingly. Regular maintenance and knowing when to retire a worn-out plow are equally crucial for its longevity and efficiency.
We hope this guide has provided you with a solid foundation in using a moldboard plow. Remember, the goal is not only to turn over the soil but also to promote better drainage, control weed growth, and facilitate a healthier soil environment. Embrace the time-honored technique of moldboard plowing, and you’ll be rewarded with improved crop yields and vibrant gardens. So, arm yourself with knowledge, grab your plow, and embark on a journey of sustainable land cultivation. Happy plowing!


