Welcome to our comprehensive guide on utilizing Windows Movie Maker! Whether you’re a budding filmmaker or simply looking to create polished videos for personal use, this user-friendly software is a fantastic choice. In this article, we will walk you through the ins and outs of Windows Movie Maker, providing step-by-step instructions and valuable tips to help you unleash your creativity. From importing media files to adding effects and transitions, to saving and sharing your masterpiece, you’ll find everything you need to know right here. So, let’s dive in and explore the exciting possibilities of Windows Movie Maker!
Introduction to Windows Movie Maker
Microsoft Windows Movie Maker is a user-friendly video editing software that allows you to create and edit your own movies effortlessly. With its simple interface and intuitive features, even beginners can quickly learn how to use this powerful tool to unleash their creativity and produce stunning videos. In this post, we will provide you with a step-by-step guide on how to use Windows Movie Maker, enabling you to bring your ideas to life and share your stories with the world.
Before we dive into the specifics of using Windows Movie Maker, it’s important to ensure that you have the software installed on your computer. Windows Movie Maker is compatible with Windows operating systems, and it is typically included in the Windows Essentials package. If you don’t have it installed, you can easily download and install it from the official Microsoft website.
Once you have Windows Movie Maker installed, you can launch the program and begin creating your first project. To start a new project, click on the “File” tab at the top left corner of the screen and select “New Project.” Give your project a name and choose a location to save it on your computer. Windows Movie Maker will create a new project file for you to work with.
Now that you have your project set up, it’s time to import your media files. Click on the “Home” tab in the top menu and select “Add videos and photos.” Browse through your computer files and select the videos and photos you want to include in your movie. You can import multiple files at once by holding down the Ctrl key while selecting them. After importing, you will see thumbnails of your media files displayed in the “Collections” panel.
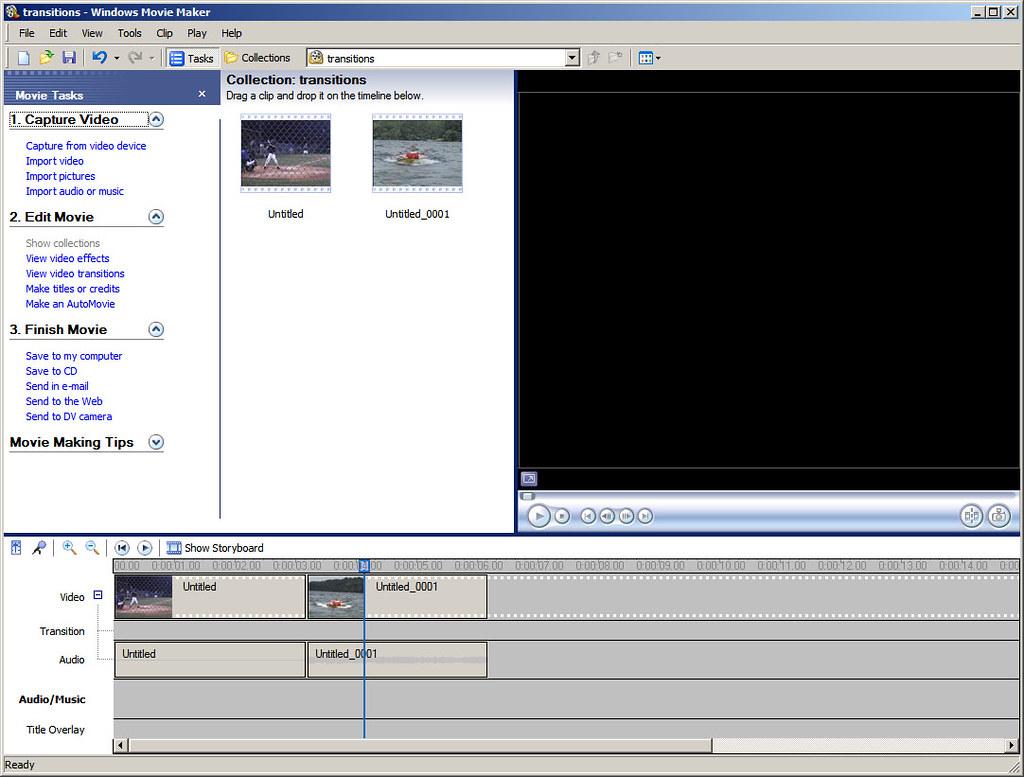
With your media files imported, you can now start arranging them on the timeline to create your movie. The timeline is located at the bottom of the screen, and it serves as a visual representation of the sequence of your video clips and photos. Simply drag and drop your media files from the “Collections” panel onto the timeline in the desired order. You can trim, rotate, and split your clips directly on the timeline to refine their duration and content.
Once your media files are arranged, you can enhance your movie by applying various visual effects, transitions, and video/audio adjustments. Windows Movie Maker provides a range of ready-to-use effects and transitions that you can easily apply to your clips. To access these options, click on the “Visual effects” or “Transitions” tab in the top menu. Experiment with different effects and transitions to add style and professionalism to your movie. Additionally, you can adjust the brightness, contrast, and saturation of your video clips by clicking on the “Visual effects” tab and selecting “Video adjustments.”
In conclusion, Windows Movie Maker is a versatile and user-friendly tool for creating and editing videos with ease. By following the steps outlined in this post, you can start using Windows Movie Maker to bring your creative vision to life. From importing and arranging media files to applying effects and transitions, this software provides everything you need to produce high-quality movies. So why wait? Download Windows Movie Maker today and embark on your video editing journey!
Understanding the User Interface of Windows Movie Maker
Windows Movie Maker is a powerful and user-friendly software that allows you to create and edit videos easily. In this post, we will guide you through the user interface of Windows Movie Maker, helping you understand and navigate the various tools and features available.
-
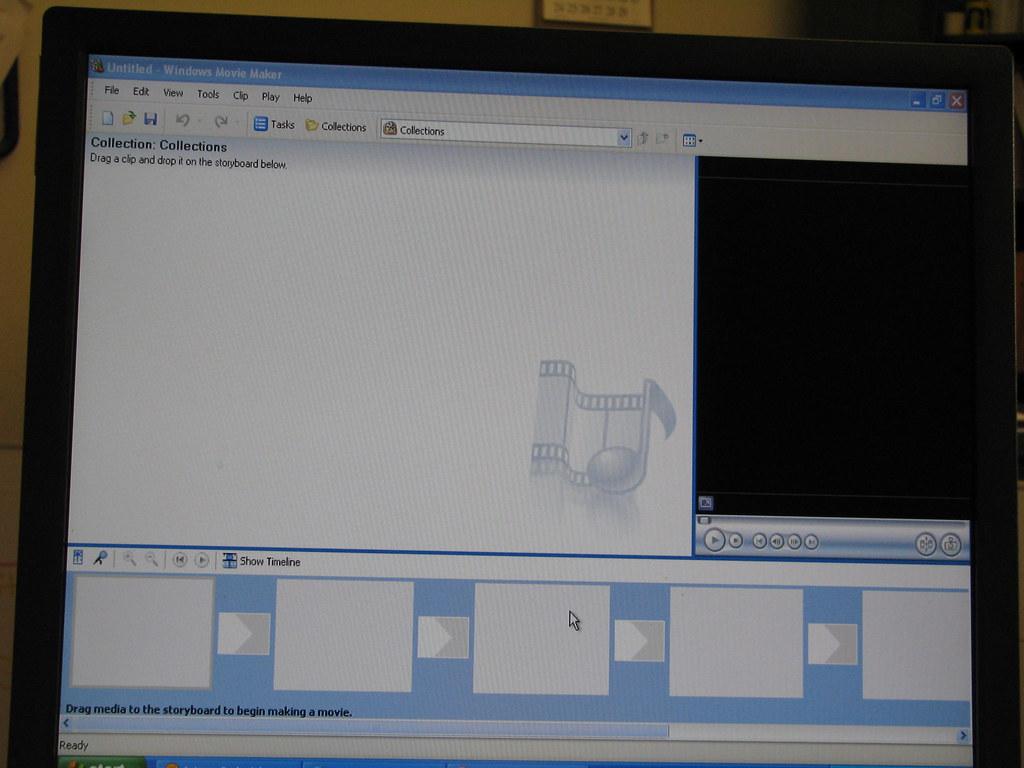
Menu Bar: Located at the top of the interface, the menu bar provides access to different functions of the program. Here, you can find options to create a new project, open and save projects, import media files, and export your finished video.
-
Storyboard and Timeline: The main area of the interface is divided into two sections: the storyboard and the timeline. The storyboard provides a simplified view of your video, displaying each scene in chronological order. On the other hand, the timeline allows for more precise editing, enabling you to adjust the duration, add effects, and arrange the order of scenes.
-
Preview Window: Located on the right-hand side of the interface, the preview window allows you to view your video in real-time as you make changes. You can also play, pause, and scrub through your video to check the progress.
-
Tools and Effects: Below the storyboard and timeline sections, you will find a collection of tools and effects that you can apply to your video clips. These include transitions to seamlessly merge scenes, video and audio effects to enhance the visual and audio quality, as well as titles and captions to add text overlays.
-
Export and Share: Once you have finished editing your video, it’s time to export and share it with others. Windows Movie Maker provides different options for exporting your video, such as saving it in various file formats or directly uploading it to social media platforms. You can also customize the video settings, including resolution, bitrate, and frame rate, to ensure optimal playback on different devices.
In conclusion, is essential for creating and editing videos effortlessly. Familiarizing yourself with the menu bar, storyboard, timeline, preview window, and various tools and effects will allow you to unleash your creativity and produce professional-looking videos. So, start exploring the interface, experiment with different features, and let your imagination run wild!
Importing and Organizing Media Files in Windows Movie Maker
Once you’ve familiarized yourself with the basics of Windows Movie Maker, it’s time to dive into importing and organizing your media files. This section will guide you through the process of bringing your files into the software and arranging them in a way that makes editing a breeze.
First and foremost, you’ll need to gather all the media files you want to include in your project. These can be photos, videos, and even audio clips. Once you have them at hand, open Windows Movie Maker and click on the “Add photos and videos” button located in the Home tab. Alternatively, you can simply drag and drop your files directly into the software.
Now that you’ve imported your media files, it’s time to organize them. Windows Movie Maker allows you to create collections, which are like folders that help you keep everything neat and tidy. To create a collection, simply right-click on an empty area in the media library and select “New Collection.” Give your collection a name and you’re good to go!
To add files to your collection, simply drag and drop them into the desired collection folder. You can also right-click on a media file and select “Add to Collection” before choosing the appropriate collection from the list. This way, you can keep similar files together, making it easier to locate them during editing.
If you wish to rearrange the order of your media files, simply click and drag them to the desired location within the timeline or storyboard. This feature is particularly useful when you want to create a specific sequence or flow in your project. Additionally, you can reduce clutter by hiding files that you’re not currently working with. Right-click on a file and select “Hide” to conceal it from view.
In summary, is a straightforward process. By following these steps, you can easily bring your files into the software, create collections to keep them organized, and arrange them in a desired order within the timeline or storyboard. So go ahead and unleash your creativity – the possibilities are endless!

Creating and Editing Videos Using Windows Movie Maker’s Tools and Features
With its user-friendly interface and wide range of tools and features, Windows Movie Maker is a powerful yet accessible video editing software. Whether you are a beginner or an experienced video editor, there are several tools and features in Windows Movie Maker that can help you create and edit your videos with ease.
-
Importing and organizing media: One of the first steps in creating a video is importing your media files into Windows Movie Maker. You can import videos, photos, and audio files from your computer or directly from your camera or smartphone. Once imported, you can organize your media files in the timeline to start building your video.
-
Trimming and splitting clips: Windows Movie Maker allows you to trim and split video clips to precisely select the desired portions for your video. By using the split tool, you can divide a long clip into multiple smaller ones and rearrange them as needed. This makes it easy to remove unwanted sections or create engaging transitions in your video.
-
Adding transitions and effects: To enhance the visual appeal of your video, Windows Movie Maker provides an array of transitions and effects. From basic fades and dissolves to more dynamic effects like flips and spins, you can choose from various pre-built options to add professional polish to your video. Experiment with different transitions to find the ones that best suit your content.
-
Incorporating titles and captions: Adding titles and captions can significantly improve the overall quality of your video. With Windows Movie Maker, you can easily insert text overlays and customize their appearance to match your video’s theme. Whether you want to introduce a scene, provide context, or highlight key points, titles and captions can help convey your message effectively.
-
Exporting and sharing your video: Once you have completed editing your video, it’s time to share it with the world. Windows Movie Maker allows you to export your video in various formats, suitable for sharing on social media platforms or uploading to video hosting sites. You can choose the resolution, aspect ratio, and quality settings to ensure your video looks its best. Additionally, you can save your project in Windows Movie Maker’s native format for future edits.
Windows Movie Maker provides a comprehensive set of tools and features to help you create and edit videos seamlessly. By utilizing its importing and organizing capabilities, trimming and splitting tools, transitions and effects, titles and captions, and exporting options, you can bring your ideas to life and produce high-quality videos. Whether you’re making a personal vlog, a promotional video, or a creative project, Windows Movie Maker is a valuable tool that empowers you to express your creativity and engage your audience.
Adding Special Effects, Transitions, and Audio in Windows Movie Maker
In addition to basic video editing features, Windows Movie Maker also offers a range of exciting options to add special effects, transitions, and audio to your videos. These features can help take your videos from ordinary to extraordinary, making them more engaging and professional. Here’s a step-by-step guide on how to use these creative tools in Windows Movie Maker.
1. Special Effects
Enhance your videos with stunning special effects that can add visual appeal and captivate your audience. Here’s how:
- Step 1: Open Windows Movie Maker and import your video clip.
- Step 2: Click on the “Visual Effects” tab in the toolbar at the top of the screen.
- Step 3: Browse through the various special effects available and click on one to preview it.
- Step 4: Once you’ve found the perfect effect, click on it to apply it to your video.
- Step 5: Adjust the intensity of the effect using the slider below.
2. Transitions
To make your videos seamless and professional-looking, Windows Movie Maker provides a wide range of transitions. Follow these steps to add transitions between your video clips:
- Step 1: Import your video clips into Windows Movie Maker.
- Step 2: Click on the “Animations” tab in the top toolbar.
- Step 3: Select the transition you want to use from the available options.
- Step 4: Drag and drop the transition between two video clips in the timeline.
- Step 5: Adjust the duration of the transition to your desired length.
3. Audio
Good audio is essential for an immersive video experience. Windows Movie Maker allows you to customize the audio in your videos. Here’s how:
- Step 1: Import your video clip into Windows Movie Maker.
- Step 2: Click on the “Audio” tab in the top toolbar.
- Step 3: Browse your computer for the audio file you want to add.
- Step 4: Drag and drop the audio file onto the timeline below the video.
- Step 5: Adjust the volume level and fade-in/out options as needed.
By utilizing these features in Windows Movie Maker, you can elevate your videos to the next level, adding creativity, professionalism, and engagement to your projects. Experiment with different effects, transitions, and audio settings to discover what best suits your video’s style and content.
Q&A
Q: What is Windows Movie Maker?
A: Windows Movie Maker is a video editing software application provided by Microsoft. It allows users to create and edit videos by combining video clips, images, and audio files.
Q: Is Windows Movie Maker free?
A: Yes, Windows Movie Maker is a free application available for download on Windows computers. However, it’s worth noting that it is no longer supported by Microsoft and has been replaced by a newer program called “Story Remix.”
Q: How do I download Windows Movie Maker?
A: To download Windows Movie Maker, you can visit the Microsoft website or use a trusted software download platform. Search for “Windows Movie Maker download” and follow the provided instructions.
Q: What are the system requirements to run Windows Movie Maker?
A: The system requirements for Windows Movie Maker vary depending on your operating system version. It is best to refer to the Microsoft website or documentation for specific details regarding your system compatibility.
Q: How do I start a new project in Windows Movie Maker?
A: To start a new project in Windows Movie Maker, open the software and click on “File” and then “New Project.” You can then import video clips, images, and audio files to begin editing your project.
Q: How do I add video clips and images to my project?
A: To add video clips and images to your project, click on the “Add videos and photos” option in the Home tab. Select the desired video clips or images from your computer and click Open. They will then appear in your project library, and you can drag and drop them onto the storyboard or timeline to arrange the order.
Q: Can I trim or cut out unwanted parts from video clips using Windows Movie Maker?
A: Yes, Windows Movie Maker allows you to trim or cut out unwanted parts from video clips. Simply select the video clip in the timeline or storyboard, click on the ”Edit” tab, and use the “Trim tool” to adjust the beginning and end points of your video.
Q: How do I add titles, captions, or credits to my video?
A: To add titles, captions, or credits to your video, click on the “Home” tab and select the option that corresponds to the text you want to add. Customize the text by selecting the desired font, color, size, and position. Drag and drop the text onto the storyboard or timeline where you want it to appear.
Q: Can I enhance the visual appeal of my video using Windows Movie Maker?
A: Yes, Windows Movie Maker provides several visual effects and enhancements to enhance the look of your videos. Click on the “Visual effects” tab and choose from a variety of effects like transitions, animations, and video adjustments.
Q: How do I save and share my completed video project?
A: To save your completed video project, click on “File” and then “Save Project.” This will save your project in a Windows Movie Maker specific format. To share your video, click on the “File” menu and choose “Save Movie.” Then, select the desired quality and format, and follow the prompts to save the video file on your computer. You can now share it on various platforms like social media, email, or your preferred online sharing platform. In conclusion, utilizing Windows Movie Maker as a video editing tool can enhance your creativity and contribute to the production of professional-looking videos. By following the step-by-step instructions outlined above, you can quickly familiarize yourself with the software’s user-friendly interface and access its wide range of features. From importing and organizing your media files, to applying transitions, visual effects, and soundtracks, this powerful software allows you to craft compelling narratives with ease. Whether you are a beginner or more experienced in video editing, Windows Movie Maker offers a versatile platform that caters to your needs. With its intuitive layout and flexible timeline, you can experiment with different elements and make adjustments until you achieve your desired outcome. So, embark on your video editing journey with Windows Movie Maker and bring your creative vision to life. Happy editing!


