
Dreamweaver, developed by Adobe Systems, is a powerful web development tool that has revolutionized the process of website creation. With its user-friendly interface and a plethora of features, Dreamweaver enables both beginners and experienced web developers to design and build visually appealing and functional websites. In this comprehensive guide, we will walk you through the essential steps to effectively utilize Dreamweaver, whether you are a novice looking to create your first website or an experienced designer seeking to enhance your skills. From setting up the software to utilizing its key features, this article will equip you with the necessary knowledge and techniques to harness Dreamweaver’s full potential and create stunning websites with ease.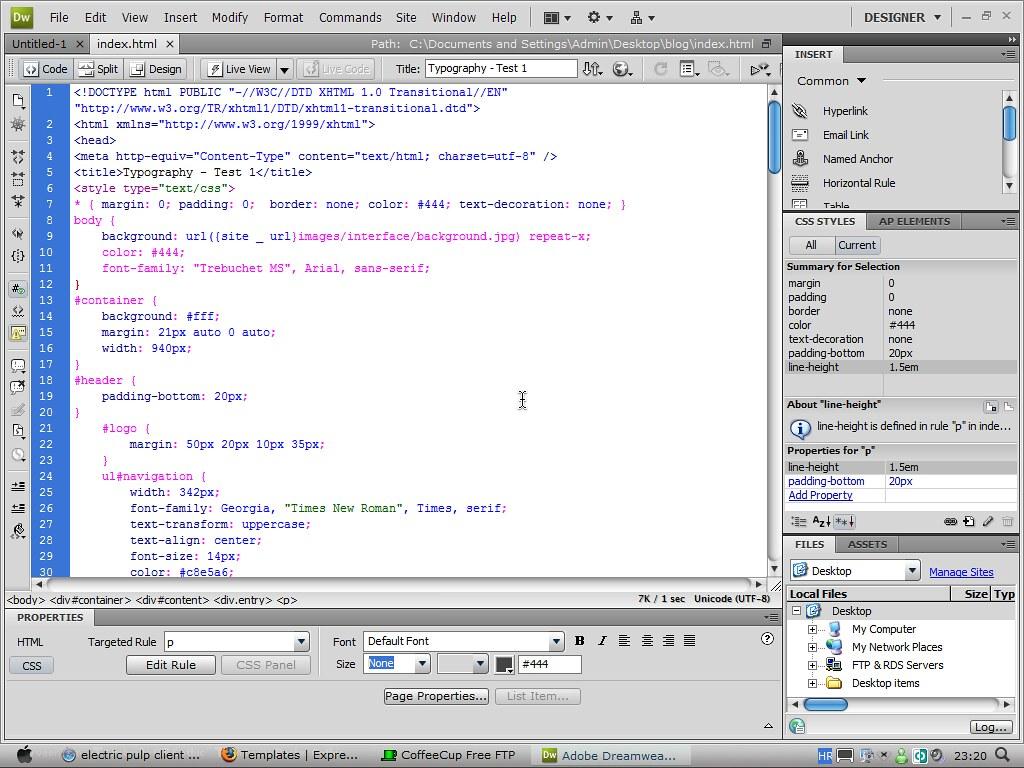
Getting Started with Dreamweaver
Dreamweaver is a powerful software tool used for web development. Whether you are a beginner or have some experience in web design, learning how to use Dreamweaver can greatly enhance your skills and make the process of creating websites more efficient. In this post, we will guide you through the basics of using Dreamweaver, from setting up your workspace to creating and editing your web pages.
-
****: Once you have installed Dreamweaver, the first step is to familiarize yourself with its interface. The main window is divided into different panels, such as the Document Window, Files Panel, and Properties Panel. Take some time to explore these panels and customize your workspace by rearranging them according to your preference.
-
Creating a New Web Page: To start building your website, go to the “File” menu and select “New”. In the New Document dialog box, choose “Blank Page” and select the desired document type. You can create a new HTML, CSS, or JavaScript file depending on your project requirements. Once you have chosen the document type, click “Create” to create a new web page.
-
Design and Layout: Dreamweaver allows you to design your web page visually or by using code. If you prefer a visual approach, you can use the Design View to drag and drop elements onto your page. For those who are comfortable with coding, the Code View provides a text editor with syntax highlighting and code suggestions. You can seamlessly switch between the two views to work on your design and code simultaneously.
-
Adding Content: Now it’s time to add content to your web page. Dreamweaver provides a wide range of tools to insert text, images, videos, and other multimedia elements. You can simply click and drag these elements onto your web page or use the Insert panel to add them. Additionally, Dreamweaver allows you to work with templates and libraries, which can save you time by reusing commonly used elements across multiple pages.
-
Testing and Publishing: Before you publish your website, it’s important to test it in different web browsers and screen sizes to ensure compatibility. Dreamweaver includes a built-in browser preview feature that allows you to see how your web page will look in popular browsers. You can also use Dreamweaver’s responsive design tools to test your website on different devices or screen resolutions. Once you are satisfied with the results, you can publish your website directly from Dreamweaver using FTP or any other method of your choice.
In conclusion, Dreamweaver is a versatile tool that can greatly simplify the process of web development. By following the steps outlined in this post, you should now have a good understanding of how to use Dreamweaver to create and edit web pages. Remember to practice regularly and explore the various features and functionalities of Dreamweaver to take your web design skills to the next level.

Exploring Dreamweaver’s User Interface
Dreamweaver is a powerful web development tool that offers a variety of features to make the process of designing and building websites easier. One of the first things you will notice when you open Dreamweaver is its user interface. While it may seem overwhelming at first, exploring its various elements will help you navigate the software efficiently.
-
Menu Bar: At the top of the Dreamweaver window, you will find the menu bar. It contains a series of dropdown menus such as File, Edit, View, Insert, and more. These menus provide access to a wide range of tools and options, allowing you to perform various tasks within the software.
-
Document Window: The document window is where you will spend most of your time in Dreamweaver. It is the main area where you can create and edit your web pages. You can switch between different document views, including Design, Code, and Split. Design view allows you to visually design your page, while Code view provides direct access to the HTML and CSS code.
-
Tools Panel: Positioned on the left side of the window, the Tools panel contains all the tools needed for designing and editing your web pages. It includes tools for selecting, drawing shapes, adding text, working with images, and much more. By simply clicking on a tool, you can easily access its functions and options.
-
Properties Inspector: Located in the upper-right corner of the Dreamweaver window, the Properties inspector displays the properties of the selected element in your web page. Whether it’s a text box, an image, or a table, you can easily modify its attributes such as size, color, font, and alignment. This panel provides you with a quick and convenient way to make changes to your design elements.
-
Files Panel: The Files panel, situated on the right side of the window, allows you to manage the files and folders related to your website. You can view, organize, and upload files directly to your server. Additionally, you can also access your site’s server settings and set up remote servers, making it easier to work with your website’s files.
In conclusion, understanding Dreamweaver’s user interface is crucial for efficiently using the software. With the menu bar, document window, tools panel, properties inspector, and files panel, you will have all the necessary tools and resources at your disposal. By familiarizing yourself with these elements, you will be well-equipped to design and develop websites effectively using Dreamweaver.
Creating and Managing Web Pages in Dreamweaver
Dreamweaver is a powerful web development tool that allows you to create and manage stunning web pages with ease. Whether you are a beginner or an experienced web developer, Dreamweaver offers a wide range of features and functionalities to help you build professional-looking websites.
One of the key features of Dreamweaver is its visual design interface, which allows you to create web pages using a drag-and-drop approach. This means that you can simply select elements from the toolbar, such as headings, paragraphs, images, and buttons, and place them onto your web page. Dreamweaver will automatically generate the HTML code for you in the background, saving you time and effort.
In addition to the visual design interface, Dreamweaver also provides a code editor for those who prefer to work with HTML, CSS, and JavaScript directly. The code editor offers features like syntax highlighting, code auto-completion, and error checking, making it easier for you to write and edit code. You can switch between the visual design interface and the code editor seamlessly, allowing you to work in whichever way suits you best.
When , it is important to organize your files and assets properly. Dreamweaver provides a file management panel that allows you to create folders, rename files, and move files around within your project. This helps you keep your web project organized and makes it easier to locate and update files in the future. Additionally, Dreamweaver offers a sync feature that allows you to synchronize your local files with a remote server, making it convenient to publish and update your web pages.
Another useful feature of Dreamweaver is its integration with popular content management systems (CMS) like WordPress. Dreamweaver allows you to directly connect to a WordPress site and manage its web pages, themes, and plugins. You can edit WordPress templates, create custom page templates, and even add new plugins from within Dreamweaver. This integration simplifies the process of creating and managing web pages in WordPress, making it a great tool for WordPress developers.
In conclusion, Dreamweaver is a versatile and powerful tool for creating and managing web pages. Its visual design interface, code editor, file management panel, and integration with CMS like WordPress make it a valuable asset for web developers. Whether you prefer to work visually or directly with code, Dreamweaver offers the flexibility and features you need to build stunning websites efficiently. So why not give Dreamweaver a try and take your web development skills to the next level?
Optimizing and Customizing Your Dreamweaver Workflow
Paragraph 1:
One of the best ways to maximize your productivity and efficiency when using Dreamweaver is to take advantage of its customizable features. Dreamweaver allows you to tailor the workspace to fit your specific needs, making it easier for you to access the tools and functions you use most frequently. To start customizing your Dreamweaver workflow, go to the “Window” menu and select ”Workspace Layout.” Here, you can choose from various predefined layouts or create your own by dragging and rearranging panels.
Paragraph 2:
Keyboard shortcuts are another great way to optimize your Dreamweaver workflow. By memorizing a few key combinations, you can perform tasks much faster than by relying solely on the mouse. Dreamweaver provides a list of default shortcuts, but you can also customize them to suit your preferences. Simply go to the “Edit” menu, select “Keyboard Shortcuts,” and customize away! Whether it’s copying and pasting code or toggling between split views, mastering keyboard shortcuts can save you valuable time and energy.
Paragraph 3:
Dreamweaver’s powerful code editor also offers several features to enhance your workflow. One of these features is auto-suggest, which provides intelligent code completion as you type. By pressing the Tab key, you can swiftly accept the suggested code, making coding more efficient and reducing errors. Additionally, Dreamweaver’s code hints offer helpful suggestions based on your coding context, helping you write cleaner and more structured code.
Paragraph 4:
Another way to optimize your Dreamweaver workflow is by utilizing its extensive library of pre-built code snippets and templates. These resources allow you to quickly insert common elements, such as navigation menus or contact forms, into your project. To access the code snippets, simply go to the “Insert” menu and select “Snippets.” You can easily customize these snippets to fit your design and save them for future use. By leveraging these pre-built components, you’ll save time and effort in developing your website.
Paragraph 5:
Lastly, Dreamweaver offers a variety of helpful extensions that can further streamline your workflow. These extensions, created by both Adobe and third-party developers, provide additional features and functionalities to enhance your design and development process. Whether it’s a responsive design tool or a debugging extension, these add-ons can help you work more efficiently. To install an extension, go to the “Window” menu, select “Extensions,” and choose from the available options.
In summary, can significantly improve your productivity and efficiency. By taking advantage of customizable layouts, keyboard shortcuts, code editor features, pre-built code snippets, and helpful extensions, you can work smarter and accomplish more in less time. So, explore the various customization options and tailor Dreamweaver to fit your design and development needs.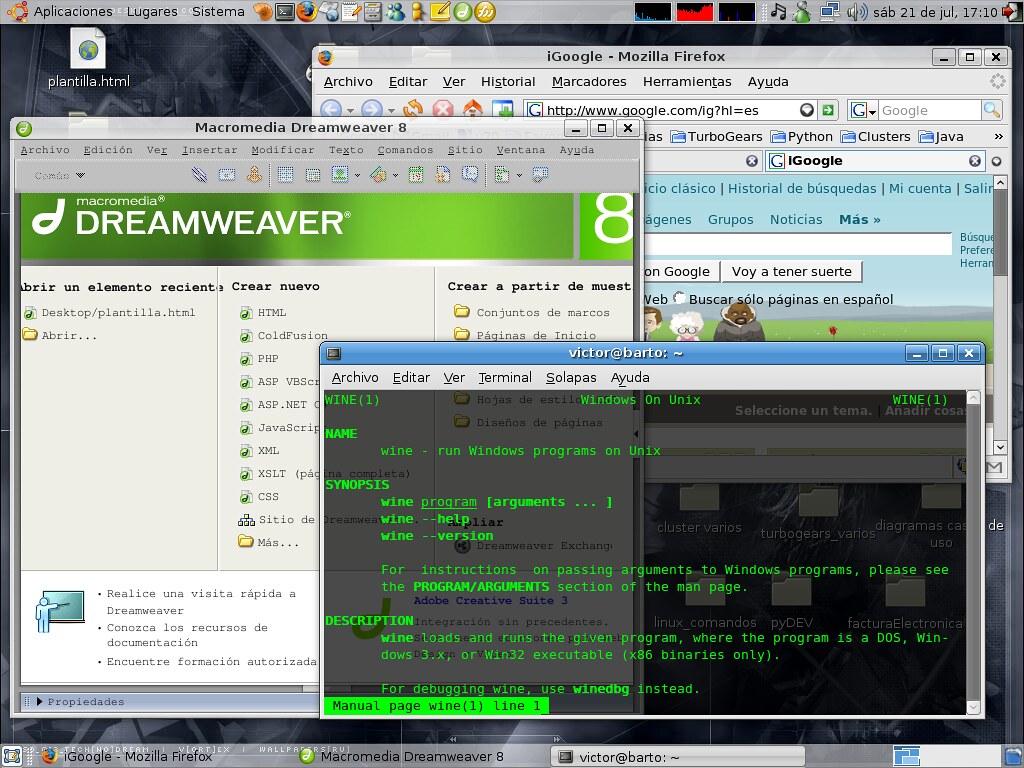
Utilizing Advanced Features and Techniques in Dreamweaver
Dreamweaver is a powerful web design tool that offers a wide range of advanced features and techniques to enhance your website. By utilizing these features, you can take your web design skills to the next level and create visually stunning and highly functional websites. In this section, we will explore some of the key advanced features and techniques available in Dreamweaver.
One of the most useful advanced features in Dreamweaver is the ability to create responsive designs. With the proliferation of mobile devices, it’s crucial for websites to be responsive and adapt to different screen sizes. Dreamweaver offers a responsive design grid that allows you to easily create fluid layouts that adjust to different devices. You can also preview your design in different screen sizes to ensure it looks great on all devices.
Another powerful feature in Dreamweaver is the ability to work with CSS preprocessors like Sass and LESS. These preprocessors allow you to write CSS in a more organized and efficient way, using variables, mixins, nesting, and other advanced features. Dreamweaver has built-in support for both Sass and LESS, making it easy to integrate them into your workflow and take advantage of their benefits.
Dreamweaver also offers advanced code editing features that can help you write clean and error-free code. You can use the code suggestion feature to quickly insert HTML, CSS, JavaScript, and other code snippets. The code hinting feature provides suggestions as you type, making it faster and easier to write code. Additionally, Dreamweaver has integrated syntax highlighting, code folding, and automatic indentation, which can improve your coding workflow and make it more efficient.
If you’re working with a team on a web design project, Dreamweaver’s collaboration features can be incredibly useful. You can easily share your project files with others, allowing them to edit and contribute to the design. Dreamweaver also provides a powerful version control system, which allows you to track changes, merge code, and easily revert to previous versions. This ensures that everyone on your team is working on the most up-to-date version of the project.
Dreamweaver also offers a wide range of advanced tools for debugging and testing your website. You can use the built-in browser preview feature to view your website in different browsers and devices. The integrated DOM inspector allows you to examine and modify the HTML and CSS of your website in real-time. Additionally, Dreamweaver provides a comprehensive set of debugging tools, including breakpoints, step-by-step execution, and error handling, which can help you identify and fix issues in your code.
In conclusion, Dreamweaver is a versatile and powerful web design tool that offers a wide range of advanced features and techniques. By utilizing these features, you can create responsive designs, work with CSS preprocessors, write clean code, collaborate with a team, and debug your website efficiently. With Dreamweaver, you have all the tools you need to take your web design skills to the next level and create professional and visually stunning websites.
Q&A
Q: What is Dreamweaver and how can it benefit me?
A: Dreamweaver is a powerful web development program that allows you to design, code, and manage websites with ease. It offers a range of features and tools that simplify the web design process, making it an ideal choice for both beginners and experienced developers.
Q: How do I download and install Dreamweaver?
A: To download Dreamweaver, visit Adobe’s official website and choose the version that suits your operating system. Once downloaded, run the installer and follow the on-screen instructions to complete the installation process.
Q: What are the key features of Dreamweaver?
A: Dreamweaver boasts several key features, including a visual design interface, code editor, built-in templates and libraries, FTP capabilities for publishing websites, support for popular programming languages, and a responsive design view, among others.
Q: Can Dreamweaver be used for both visual design and coding?
A: Absolutely! Dreamweaver offers a dual-view design environment, where you can switch between a visual design interface for creating and editing layouts and a code editor for writing HTML, CSS, and other coding languages. This flexibility allows users to work in their preferred mode, whether it’s visual design or coding.
Q: Is Dreamweaver suitable for beginners who have no coding experience?
A: Dreamweaver is renowned for its user-friendly interface and intuitive tools, making it an excellent choice for beginners who are new to web development. Its visual design view allows users to create websites visually, without the need to write code. However, learning HTML and CSS basics will greatly enhance your ability to utilize Dreamweaver’s full potential.
Q: Can I connect Dreamweaver to my web server?
A: Yes, Dreamweaver provides built-in FTP capabilities that allow you to connect to your web server and publish your websites directly from the program. Simply enter your server details, such as the FTP address, username, and password, and Dreamweaver will handle the rest.
Q: Can I import existing websites into Dreamweaver for editing?
A: Absolutely. Dreamweaver allows you to import existing websites, whether they were created in Dreamweaver or another web design tool. Simply open the file or directory in Dreamweaver, and you can begin editing and enhancing the website’s design and functionality.
Q: Does Dreamweaver have any support for responsive design?
A: Yes, Dreamweaver offers a responsive design view that allows you to see how your website will appear on different devices and screen sizes. You can easily switch between various responsive breakpoints and adjust the layout to ensure an optimal viewing experience on mobile devices, tablets, and desktops.
Q: Can Dreamweaver be extended with additional functionalities or plugins?
A: Yes, Dreamweaver supports extensions and plugins, allowing you to add extra features and functionality. You can explore Adobe’s official marketplace or other third-party websites to find and install extensions that suit your specific requirements.
Q: Is there any online support available for Dreamweaver users?
A: Absolutely. Adobe offers extensive online resources, including tutorials, forums, and documentation to help users learn and troubleshoot any issues they may encounter while using Dreamweaver. Additionally, various online communities and educational platforms offer tutorials and tips to further enhance your Dreamweaver skills. In conclusion, Dreamweaver is a powerful web development tool that offers a wide range of features and capabilities. With its user-friendly interface and intuitive design, it provides the perfect platform for both beginners and experienced developers to create stunning websites. By following the step-by-step guide provided in this article, you can easily navigate through Dreamweaver’s interface, utilize its various tools, and ultimately build your dream website. From creating responsive layouts to managing site files and implementing CSS styles, Dreamweaver simplifies the web development process and makes it accessible to all. So, whether you are a web design enthusiast or a professional developer, Dreamweaver is definitely worth exploring to enhance your skills and create exceptional websites.


