Are you a novice when it comes to electrical measurements? Fear not! This article aims to guide you through the process of using a voltmeter effectively. Whether you are trying to diagnose electrical issues, measure voltage levels, or simply gain a basic understanding of electrical circuits, this informative guide will assist you in harnessing the power of a voltmeter. With a neutral tone and easy-to-follow instructions, you’ll be equipped with the knowledge necessary to confidently handle this essential electronic tool.
Introduction to Voltmeters
A voltmeter is an essential tool for measuring electrical potential difference, commonly known as voltage, between two points in a circuit. Whether you are a beginner or an experienced electrician, understanding how to use a voltmeter is crucial for troubleshooting electrical issues and ensuring the safety of your electrical systems. In this post, we will guide you through the basics of using a voltmeter and provide some useful tips and tricks along the way.
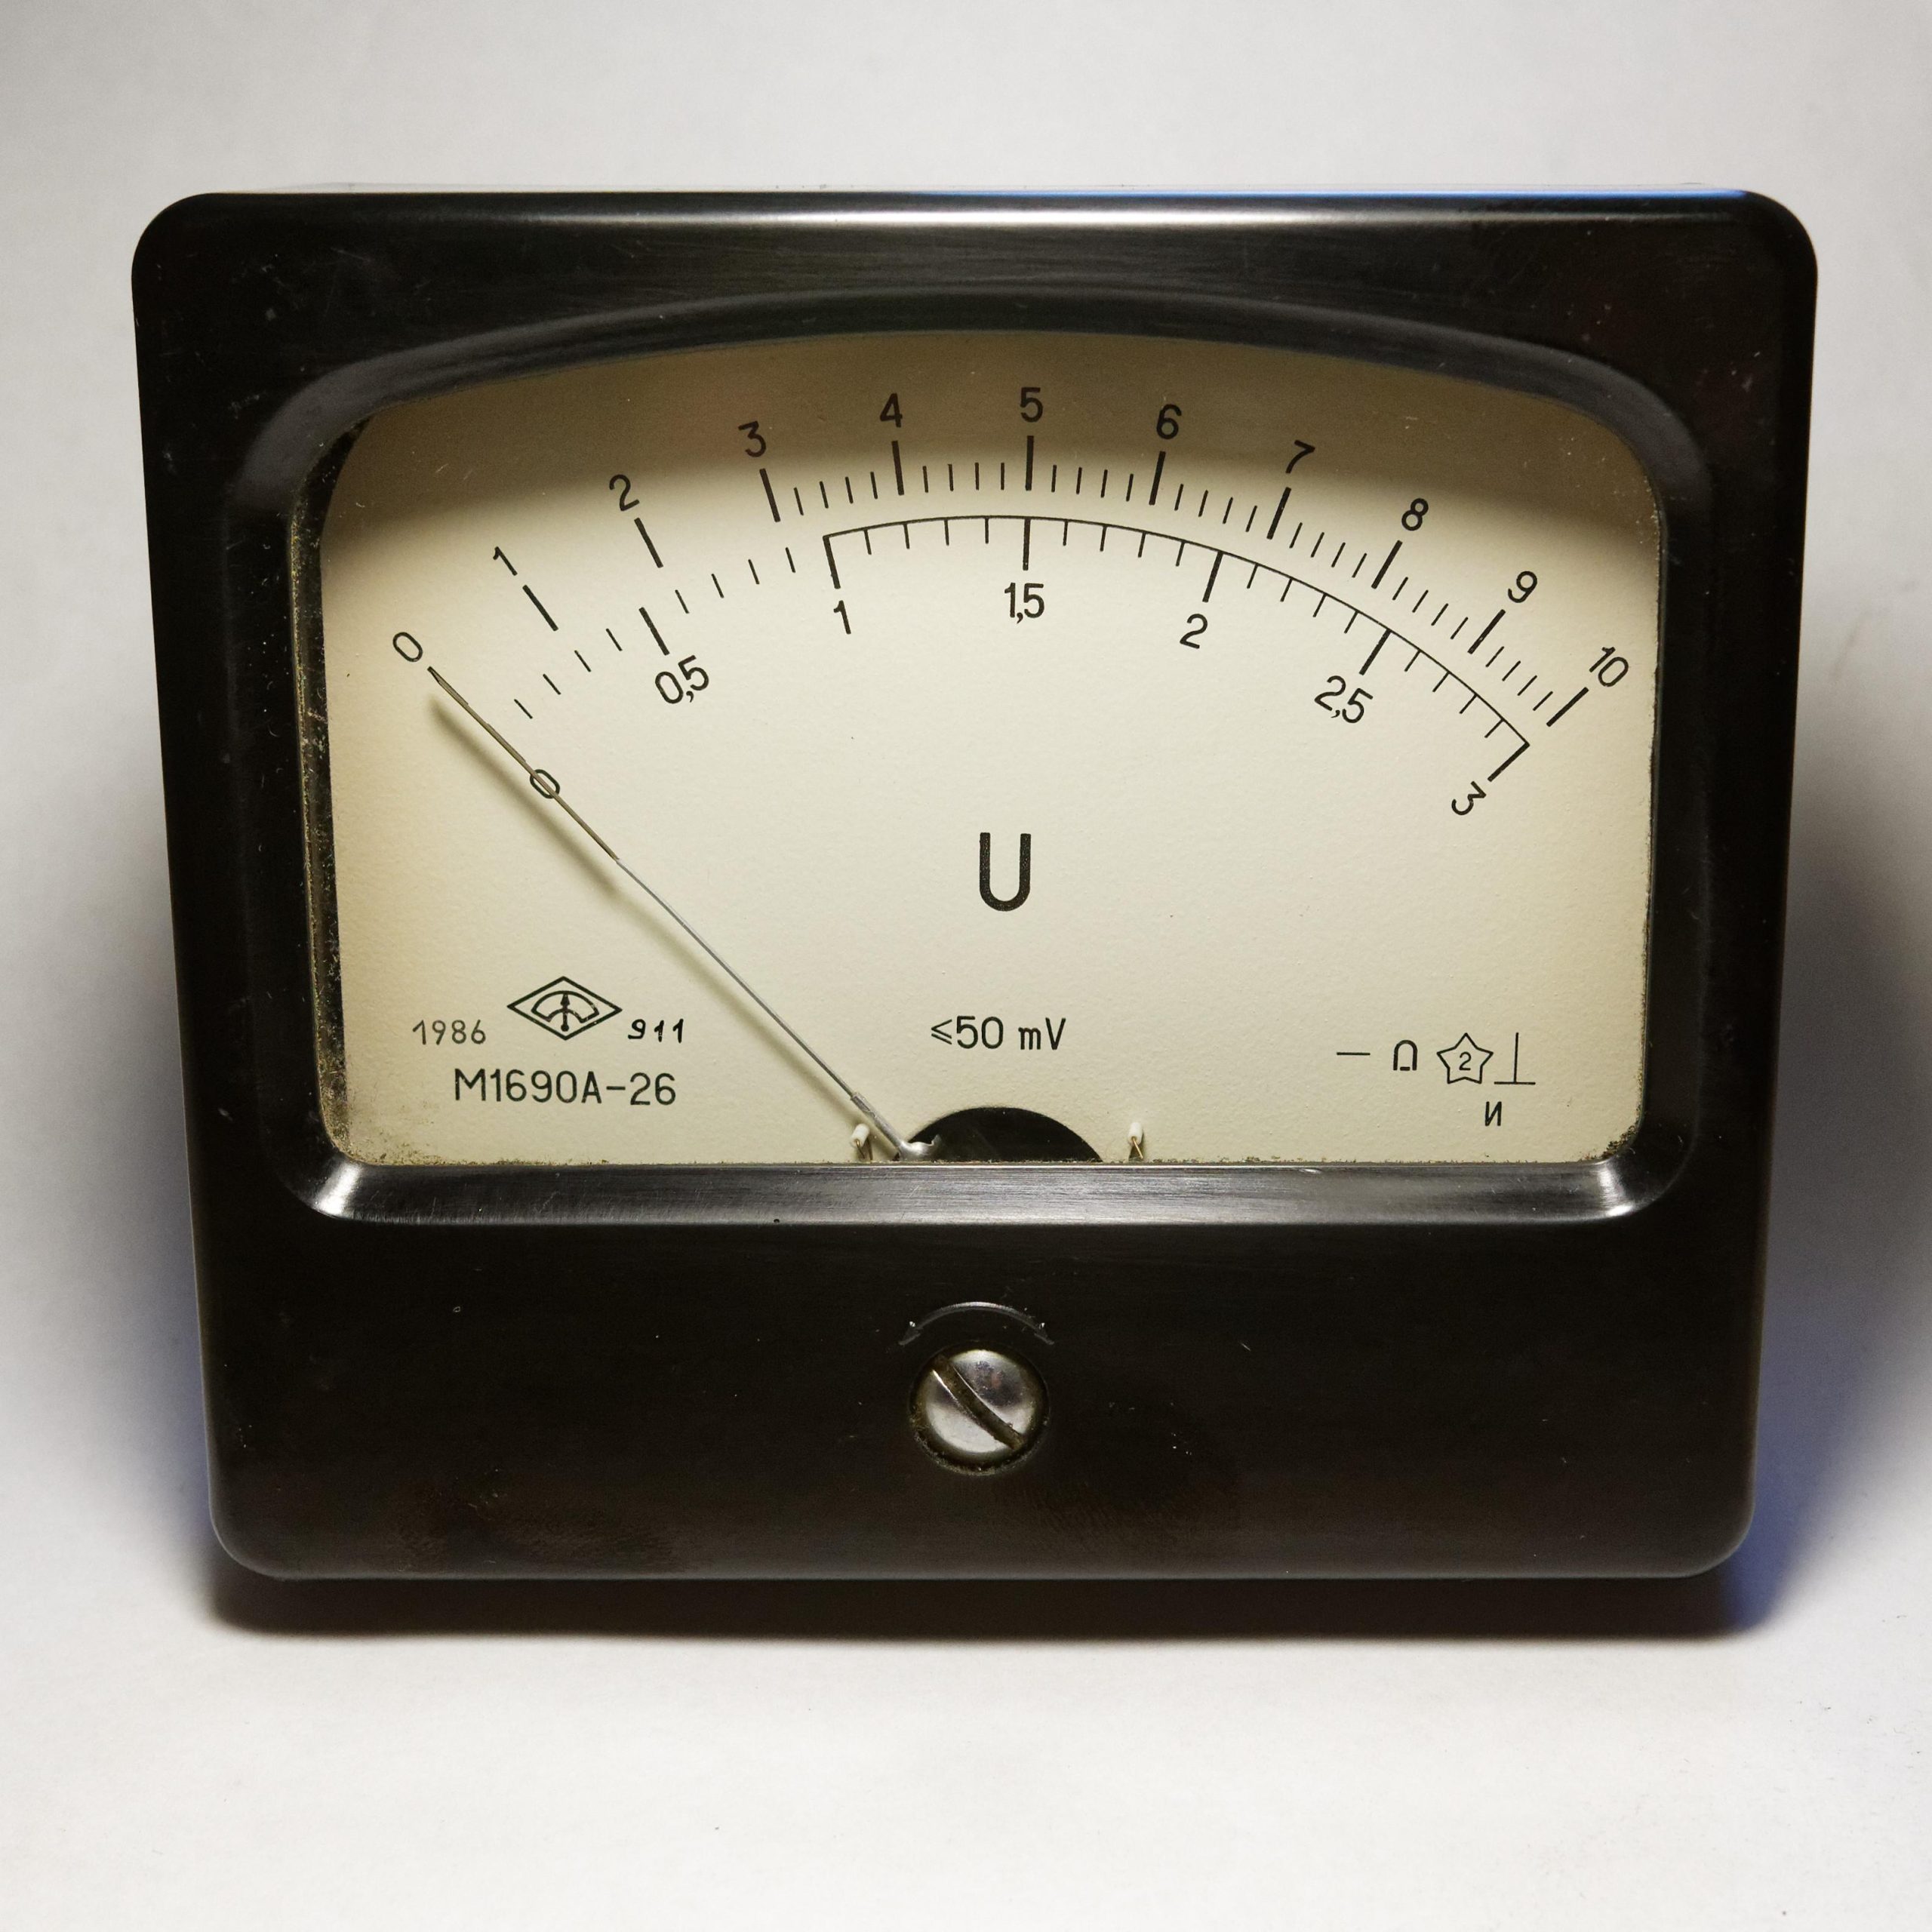
Select the appropriate voltmeter: Before delving into the usage, it’s important to choose the right type of voltmeter for your specific needs. There are two main types: analog and digital. Analog voltmeters feature a needle that moves across a scale, while digital voltmeters provide numerical readings on a digital display. Both have their advantages and disadvantages, so consider your preferences and the level of precision required for your work.
Safety precautions: Before attempting to measure voltage, it is crucial to keep safety in mind. Always ensure that the circuit you are working with is de-energized and that you are using properly insulated equipment. Test the voltmeter on a known voltage source to make sure it’s functioning correctly. Additionally, read the manufacturer’s instructions and follow any specific safety guidelines provided.
Proper connections: To measure voltage accurately, it is essential to make proper connections. Connect the voltmeter test leads to the respective ports on the voltmeter and ensure the leads are in good condition without any frayed or damaged wires. When connecting the voltmeter to the circuit, ensure that the test leads are properly plugged into the designated ports and that there are no loose connections.
Selecting the range: Voltmeters have different voltage ranges, and it’s important to choose the appropriate range to avoid damaging the device. Start with the highest range available and gradually decrease it until you obtain a reading within the optimal range. This prevents overloading the meter and ensures accurate readings.
Taking readings: When measuring voltage, it is crucial to take readings correctly. Place the red lead on the positive terminal of the source and the black lead on the negative terminal. Once the connections are secure, turn on the voltmeter and wait for a stable reading. Record the voltage value displayed on the screen or scale. It’s important to remember units of measurement, such as volts (V) or millivolts (mV), depending on the scale used.
Using a voltmeter may seem daunting at first, but with practice and proper understanding, it becomes a straightforward tool for electrical measurements. Remember to always prioritize safety, select the appropriate voltmeter, make proper connections, choose the right range, and take accurate readings. Now that you have gained a solid , you are ready to explore and experiment with this essential electrical instrument in your future endeavors.

Understanding Voltage Measurements
Using a voltmeter can be an essential skill when working with electrical systems. It allows you to measure the voltage across different components, helping you understand the electrical behavior of a circuit. In this post, we will dive into the basics of and how to use a voltmeter effectively.
Selecting the correct measurement range: Before taking any voltage measurements, it’s crucial to set your voltmeter to the appropriate range. Most voltmeters have different voltage range options, such as 200 V, 20 V, or even mV (millivolts). The selected range should always be higher than the expected voltage to prevent damaging the voltmeter or obtaining inaccurate readings.
Making the connections: To measure voltage accurately, you need to make the appropriate connections. Ensure that the power supply is off, and if necessary, disconnect the circuit from its power source. Connect the red lead of the voltmeter to the positive terminal of the component or point you want to measure. Similarly, connect the black lead to the negative terminal or ground reference point. Remember, proper connections are vital for precise measurements.
Using the right probing technique: When using a voltmeter, it’s important to have good probing techniques. Gently touch the voltmeter probes to the points you want to measure, making sure there is a solid connection. Avoid applying excess pressure as it may damage the component or affect the measurement accuracy. Also, ensure that the probes are in the correct polarities, matching the voltage reference points.
Interpreting the readings: Once you have made the connections and taken the voltage measurement, the display on the voltmeter will show the reading. It’s essential to understand how to interpret these readings accurately. If you are measuring AC voltage, pay attention to whether the value displayed is an RMS (Root Mean Square) value or a peak-to-peak value. Additionally, take note of any measurement units provided by the voltmeter.
Recording and analyzing the results: To fully comprehend voltage measurements, it’s beneficial to record and analyze the results. Maintaining a record of the measured voltages can help identify patterns or irregularities that may occur over time. You can also use these measurements to compare against known values or reference standards. Analyzing the voltage measurements enables troubleshooting, identifying faulty components, or determining the efficiency of a circuit.
Overall, and effectively using a voltmeter can greatly assist you when working with electrical systems. By following the correct procedures for measurement range selection, connection, probing, and interpretation, you can ensure accurate readings. Remember to handle the voltmeter with care and always prioritize safety when working with electricity.

Determining Voltage Range and Accuracy
In order to effectively use a voltmeter, it is crucial to understand how to determine voltage range and accuracy. This knowledge will ensure accurate measurements and prevent any potential damage to the device being tested. Here, we will explore the key considerations when using a voltmeter to measure voltage.
Familiarize yourself with the voltage range options: A voltmeter typically offers multiple voltage range options, such as AC (alternating current) and DC (direct current) settings. Using the appropriate range is essential to obtain accurate measurements. For DC voltage, the ranges commonly include 2V, 20V, 200V, and so on, while for AC voltage, the ranges may vary. Ensure that the voltage range selected is higher than the expected voltage being measured.
Confirm the voltage type: Before taking any measurements, it is important to determine whether the voltage being measured is AC or DC. Some voltmeters have a dedicated selector switch to choose between AC and DC modes, while others automatically detect the voltage type. Make sure to set the voltmeter accordingly to avoid incorrect readings.
Consider the accuracy of the voltmeter: Every voltmeter has a specified accuracy level, which indicates how close the measured value is to the actual value. It is important to choose a voltmeter with an appropriate accuracy for your specific needs. For instance, if you require precise measurements, a voltmeter with a higher accuracy level would be preferable.
Be aware of the input impedance: The input impedance of a voltmeter refers to the resistance it presents to the circuit under test. High input impedance prevents any significant current flow, which is crucial for accurate voltage measurements. Most modern voltmeters have a high input impedance, typically in the megaohm range, to minimize any loading effects on the circuit being tested.
Take note of the safety precautions: When using a voltmeter, it is vital to prioritize safety. Ensure that the voltmeter is rated for the voltage you will be measuring, and use appropriate protective equipment, such as gloves or goggles, if necessary. Additionally, always make sure to properly connect the voltmeter probes to the circuit, adhering to the correct polarity.
Understanding how to determine voltage range and accuracy will allow you to make precise and reliable measurements with your voltmeter. By considering the voltage range options, confirming the voltage type, and taking note of the voltmeter accuracy and input impedance, you can ensure optimal results. Remember to prioritize safety during all measurements, as it is essential for both your well-being and the longevity of your equipment.
Connecting and Using a Voltmeter Properly
Using a voltmeter is an essential skill for anyone working with electrical circuits. Whether you are a seasoned electrician or a DIY enthusiast, knowing how to connect and use a voltmeter properly is crucial for accurate measurements and safe troubleshooting. In this post, we will guide you through the steps of connecting and using a voltmeter effectively.
Safety first: Before you start using a voltmeter, it is important to ensure your safety. Make sure the circuit you are working on is powered off and that you are wearing appropriate protective gear, such as gloves and safety goggles. Remember, electricity can be dangerous, so always take necessary precautions.
Connecting the voltmeter: To connect the voltmeter properly, first identify the positive (red) and negative (black) leads. The red lead typically connects to the positive terminal, also known as the ”live” or “hot” side of the circuit, while the black lead connects to the negative terminal, often referred to as the ”ground” or “neutral” side. Make sure the voltmeter is set to the correct voltage range before making any connections.
Taking measurements: Once your voltmeter is properly connected, you are ready to take measurements. Place the red lead on the point in the circuit where you want to measure the voltage, and the black lead on the ground or neutral side. Then, switch on the power and carefully observe the readings on the voltmeter. Take note of any fluctuations or abnormalities, as they may indicate a potential issue in the circuit.
Interpreting the readings: Understanding the readings on your voltmeter is crucial for troubleshooting electrical problems. If you are measuring a DC (Direct Current) circuit, a positive reading indicates the presence of voltage, while a negative reading signifies a reverse polarity. In an AC (Alternating Current) circuit, the voltage readings will fluctuate between positive and negative values, representing the different polarity of the current.
Recording and analyzing data: To ensure accurate measurements over time, it is important to record and analyze the data obtained from voltmeter readings. You can create a simple table using HTML to document the voltage measurements, along with other relevant details such as the date, time, circuit location, and any observations made during the measurement. This data will help you identify patterns or changes in voltage levels, assisting in diagnosing potential electrical issues.
In conclusion, understanding how to connect and use a voltmeter properly is essential for anyone working with electrical circuits. By following the steps outlined in this post, you can ensure accurate measurements, troubleshoot effectively, and maintain a safe electrical environment. Remember to always prioritize your safety and exercise caution when working with electricity.
Safety Precautions when using a Voltmeter
Using a voltmeter is a common practice among electricians and DIY enthusiasts when it comes to measuring voltage in electrical circuits. While it provides valuable information, it is essential to prioritize safety precautions to prevent accidents and ensure accurate readings. So, here are some important safety measures to keep in mind when using a voltmeter:
1. Wear Protective Gear
Always prioritize your safety by wearing protective gear when using a voltmeter. This includes safety glasses, insulated gloves, and appropriate clothing. These measures can protect you from potential electrical hazards such as burns, shocks, or short circuits. Remember, prevention is better than cure!
2. Inspect the Voltmeter
Prior to using a voltmeter, thoroughly inspect it for any signs of damage or malfunction. Check the cables, probes, and connectors for any visible wear and tear. If you notice any defects, do not use the voltmeter and have it repaired or replaced by a professional.
3. Ensure Proper Grounding
Before connecting the voltmeter to any electrical circuit, always ensure that you and your equipment are properly grounded. This helps to prevent electric shocks and maintains accuracy in voltage readings. Double-check the grounding connections and verify that they are secure and reliable.
4. Avoid High Voltage Circuits
When using a voltmeter, it is important to exercise caution and avoid working with high voltage circuits unless you have advanced training and experience. These circuits pose a significant risk of electric shock and other hazards. If you are unsure about the voltage, consult a professional or consider using alternative methods.
5. Follow Proper Testing Procedures
To ensure accurate measurements and your safety, always follow proper testing procedures when using a voltmeter. These may include turning off power sources, using appropriate range settings, and maintaining a steady hand while probing. Refer to the voltmeter’s user manual for specific guidelines and instructions.
Q&A
Q: What is a voltmeter?
A: A voltmeter is a measuring instrument used to measure the electrical potential difference, or voltage, between two points in an electrical circuit.
Q: What are the types of voltmeters available?
A: There are two main types of voltmeters: analog voltmeters and digital voltmeters. Analog voltmeters display readings on a scale using a needle, while digital voltmeters provide numerical readings in digits.
Q: How does a voltmeter work?
A: A voltmeter is connected in parallel to the points where voltage measurement is desired. When connected correctly, it measures the potential difference between the two points and displays the voltage reading on the scale or digital display.
Q: What are the units of measurement used by a voltmeter?
A: The standard unit of voltage measurement is volts (V). However, depending on the range and capabilities of the voltmeter, it may also display millivolts (mV) or kilovolts (kV).
Q: What precautions should be taken while using a voltmeter?
A: It is important to ensure that the voltmeter is set to the appropriate voltage range before taking any measurements. Additionally, one should be cautious of high voltages, take necessary safety measures, and avoid touching live circuits.
Q: How can I measure voltage using a voltmeter?
A: To measure voltage, first, switch off power to the circuit you will be working on. Connect the red lead of the voltmeter to the positive terminal and the black lead to the negative terminal, making sure the polarity is correct. Finally, turn on the power and read the meter’s display or scale for the voltage measurement.
Q: Can a voltmeter measure voltage for both AC and DC circuits?
A: Yes, most voltmeters can measure voltage in both alternating current (AC) and direct current (DC) circuits. However, it is essential to set the voltmeter to the appropriate mode depending on the type of current in the circuit.
Q: How accurate are voltmeter readings?
A: The accuracy of voltmeter readings depends on the quality and precision of the instrument. Higher-quality digital voltmeters generally offer more accuracy compared to analog ones. Accuracy is usually specified as a percentage of the full-scale reading.
Q: Can a voltmeter measure current or resistance as well?
A: While some multimeters have the ability to measure current and resistance along with voltage, a standalone voltmeter is solely designed for voltage measurements. To measure current or resistance, a separate ammeter or ohmmeter should be used, respectively.
Q: Are there any safety tips to keep in mind when using a voltmeter?
A: Yes, when using a voltmeter, it is crucial to avoid contact with live circuits, wear appropriate safety gear such as gloves and safety glasses, and follow proper electrical safety procedures. If you are uncertain about any aspect of using a voltmeter, it is best to consult a professional or an experienced individual. In conclusion, understanding how to use a voltmeter is an essential skill for anyone dealing with electrical systems. By following some simple steps, you can effectively measure voltage and diagnose electrical issues with confidence. Remember to prioritize safety and double-check your connections before proceeding. Additionally, ensure that the voltmeter is properly calibrated and set to the appropriate range for accurate measurements. With practice, you will become more proficient in utilizing this versatile tool, allowing you to troubleshoot electrical problems efficiently. Keep in mind that this article has provided a general overview, and you should refer to the manufacturer’s instructions for specific guidelines on your particular voltmeter model. So, whether you are a seasoned electrician or a DIY enthusiast, armed with your newfound knowledge, you are ready to embark on a journey of discovering and understanding the world of voltage with a voltmeter. Happy measuring!


